

Marketing
Jan 24, 2025
Master the Basics: Get familiar with tools like the Navigator Panel, Design Tools, and Canvas Area.
Use Official Resources: Start with Webflow University and Framer Learn for step-by-step tutorials.
Build Small Projects: Practice by creating simple websites like landing pages or contact forms.
Join Online Communities: Connect with Webflow and Framer forums to get advice, feedback, and inspiration.
Increase Complexity Gradually: Start with static layouts and slowly add animations, interactions, and responsive designs.
Learn Design Methods: Focus on responsive design, accessibility, and performance optimization.
Practice Troubleshooting: Use built-in testing tools to find and fix issues like layout bugs or slow load times.
Quick Comparison: Webflow vs. Framer
Feature | Webflow | Framer |
|---|---|---|
Learning Resources | Webflow University (100+ hours) | Framer Learn (interactive guides) |
Design Focus | Visual coding + responsive design | Prototyping + animations |
Best For | Polished websites | Interactive experiences |
Community | ||
Performance Tools | Audit panel | Debug mode for animations |
Pro Tip: Start small, practice consistently, and use community feedback to improve. Whether you’re a beginner or leveling up, these platforms can help you create professional-quality websites and apps.
Learn Framer For Beginners: Mini Course (2024)
1. Learn the Basic Tools and Layout
Getting comfortable with the basic tools and layout is the first step to creating an efficient design workflow. By understanding how the key features work together, you'll set yourself up for success in your design projects.
Key Areas to Know
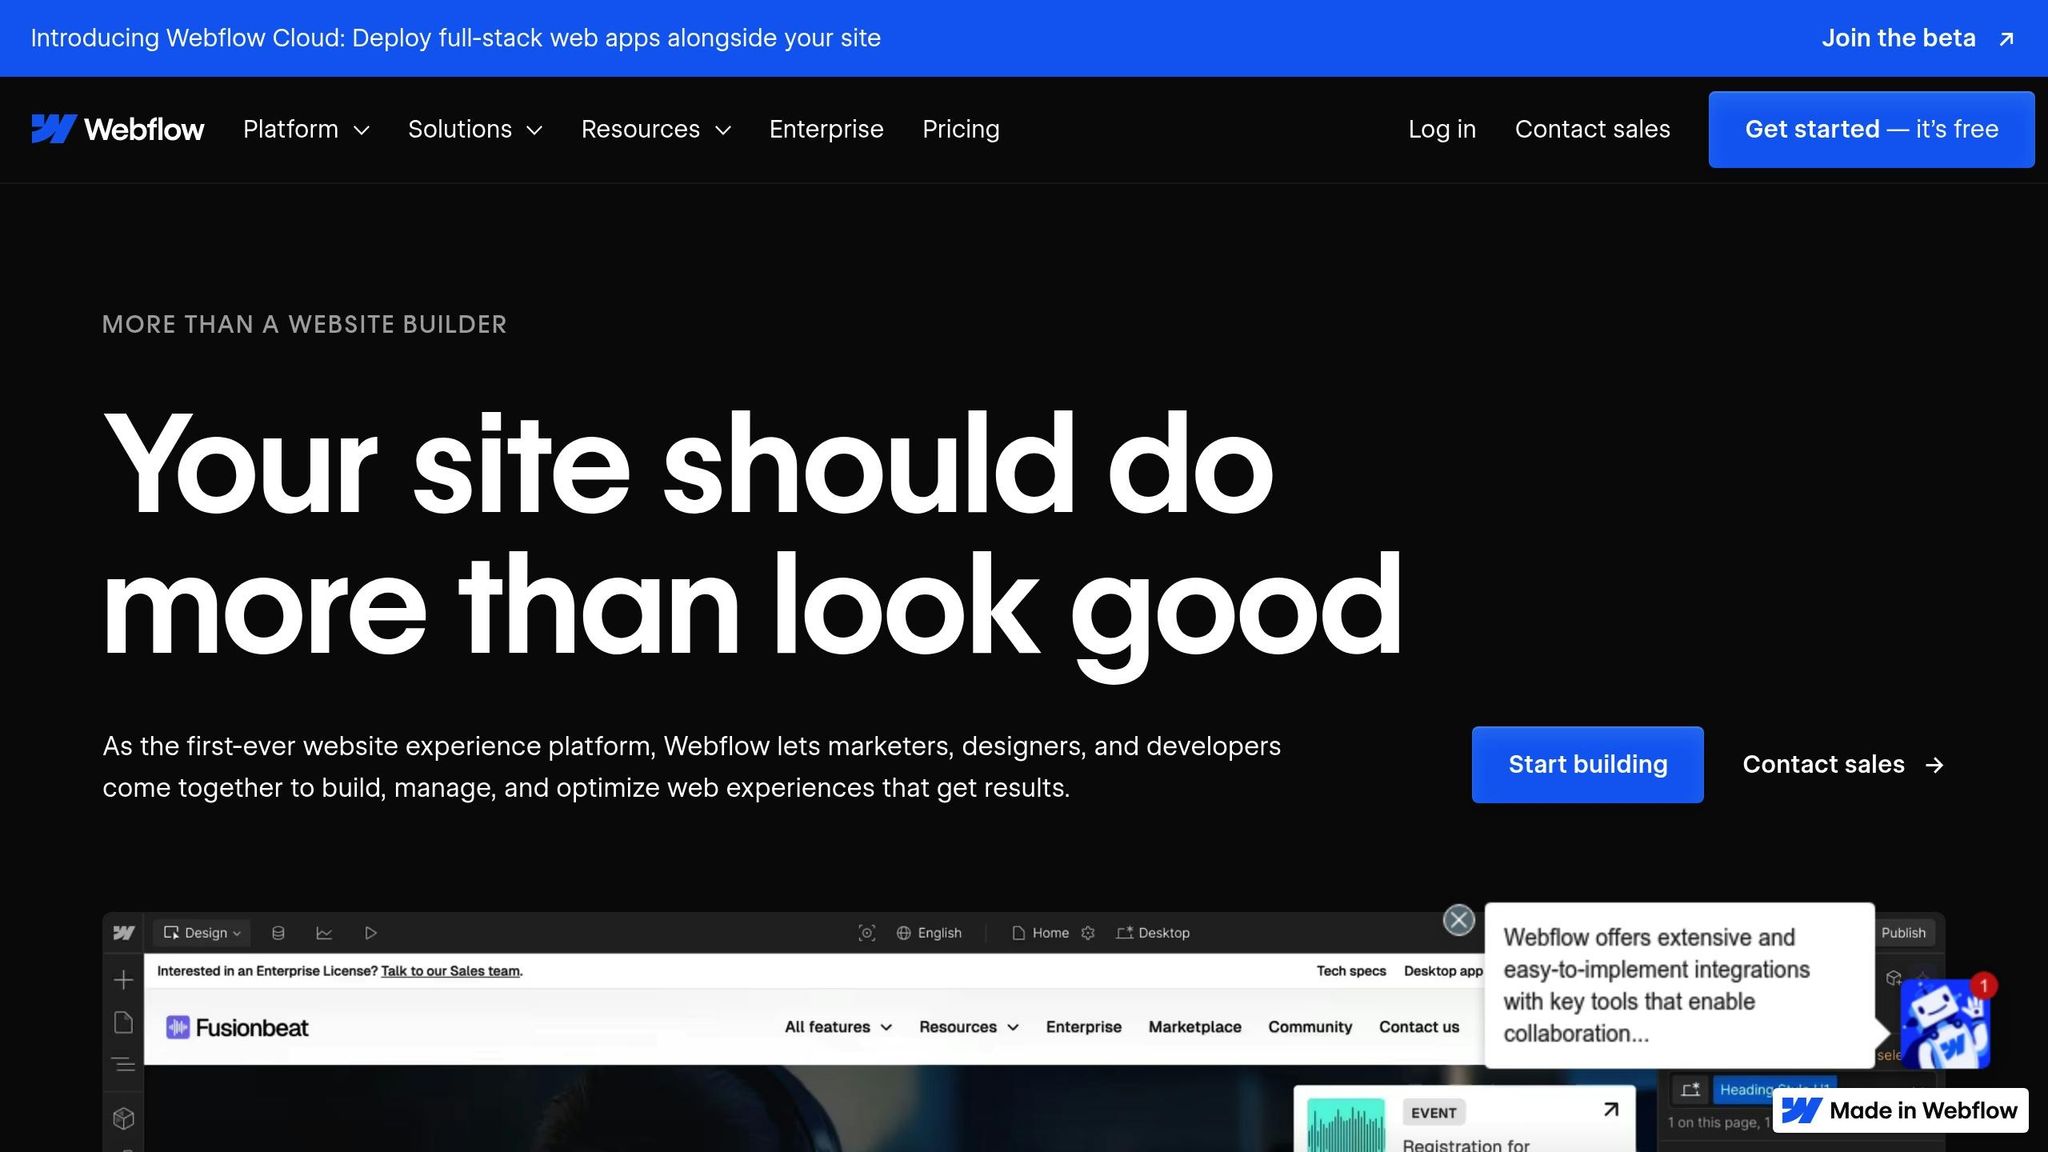
Navigator Panel: Found on the left side, this is your go-to for organizing your workspace. It keeps all your elements neatly arranged for quick access.
Design Tools: Located on the right sidebar, these controls let you handle style settings, animations, breakpoints for responsive design, and even preview your work.
Canvas Area: This is the heart of your workspace. Here, you can:
Zoom, pan, and align elements with precision
Switch between desktop and mobile views
Preview interactions as you build them
Tips to Build Confidence with the Tools
Learn and use keyboard shortcuts - they’ll save you tons of time.
Keep your layers and components organized from the start to avoid confusion later.
Save your work often and use version control to track changes.
Spend time experimenting on a blank canvas. It’s a great way to build muscle memory and get a deeper understanding of the tools.
2. Use Official Training Materials
If you're serious about mastering Webflow or Framer, their official training materials should be your go-to resource.
Official Learning Paths
Both platforms provide structured courses to help you level up:
Webflow University: This free platform offers over 100 hours of video tutorials. You'll find everything from basic navigation to advanced animations and interactions.
Framer Learn: An interactive hub packed with tutorials, video guides, and hands-on exercises.
Once you’ve absorbed the lessons, put your knowledge to work through practice.
Getting the Most Out of Official Resources
Start with the foundational courses. These will guide you through essential skills like navigating the interface, creating components, responsive design, and animation basics. Stick to the recommended sequence to ensure you don’t miss any critical steps.
Add-On Learning Tools
While official resources are your main focus, you can deepen your understanding with these extras:
Documentation: The official docs are perfect for quick lookups and clarifications.
Templates: Study official templates to see how experts structure projects.
Community Projects: Browse showcase galleries to get inspired by real-world examples.
These supplementary tools help connect the dots between theory and hands-on application.
Practice Makes Perfect
Don’t just watch or read - practice! Complete every exercise to solidify your skills.
Pro Tip: Set up a dedicated practice project where you can freely experiment with the techniques you’re learning. It’s a safe space to try things out without the fear of messing up a live project.
3. Build Simple Test Projects
Once you've got the basics down, it's time to put your skills to work with small, manageable projects. These exercises will not only boost your confidence but also help you get a deeper understanding of key features in tools like Webflow or Framer.
Start with Straightforward Projects
Kick things off with simple ideas like a personal landing page, a product showcase, or a basic contact form. These types of projects are great for mastering core functionalities without feeling overwhelmed.
Set Realistic Deadlines
Sometimes, all it takes is focused effort to create something impressive in a short time. Offlens Studio has demonstrated this by completing a landing page project in less than 24 hours.
Louis (@louiss) shared his experience:
"I worked with them to launch my landing page. They said they could do the job in under 24 hours and that is exactly what they did. Super happy about the result, it's exactly what I wanted and described to them. 10/10 Would absolutely recommend them to build and launch landing pages."
Simplify Complex Features
When tackling more advanced features, break them into smaller, manageable steps:
Start with Structure: Build the basic layout to establish the framework.
Add Styling: Focus on typography, colors, and overall design aesthetics.
Implement Interactions: Introduce simple animations or hover effects.
Test Responsiveness: Make sure everything looks and works well on mobile devices.
Prioritize Quality Over Speed
While quick turnarounds can be impressive, taking the time to fully understand each feature will lead to better results in the long run.
Perrin (@perrrrrrin) praised a similar approach:
"They were absolutely amazing for the Figma and Framer work. They understood the task in one sentence, and got the job done in 12 hours!! I was expecting a few days but they really went above and beyond with speed and quality. Highly recommend them."
Stay Organized
Good organization is key to a smooth workflow. Use clear folder structures and consistently name your components. As you go, document what you learn and thoroughly test your work before moving on to the next step.
Once you’ve nailed a few basic projects, you can start pushing yourself with more complex challenges. Each step will bring you closer to mastering these tools.
4. Join Online Design Groups
Once you've got a handle on the tools and have started building projects, connecting with other designers can take your skills to the next level. Joining online design communities is a great way to sharpen your Webflow or Framer expertise while learning from others.
Where to Find Support
Online communities like the Webflow Forum and Framer Community are treasure troves of advice and inspiration. Here's what you can gain by being part of these groups:
Get help with technical questions
Share your work and receive constructive feedback
Learn best practices from experienced designers
Explore new techniques and platform features
Build connections with like-minded creatives
These spaces are perfect for solving problems quickly and learning actively through collaboration.
Making the Most of Community Resources
Dive in by introducing yourself and sharing your learning goals. This not only helps others understand how they can assist you but also lays the foundation for meaningful interactions. Posting your progress - complete with before-and-after examples or challenges you've tackled - can solidify your learning and inspire others.
Stay in the Loop with Platform Updates
One of the biggest perks of being part of these groups? Staying informed about platform updates and trends. Community discussions often highlight:
New feature rollouts and how to use them
Workflow changes caused by updates
Practical solutions for common issues
Insights into emerging design trends
By keeping up with these conversations, you can adapt quickly and stay ahead of the curve.
How to Engage Effectively
To get the most out of these communities, focus on meaningful participation. Here are some tips:
Clearly explain your goals or the challenges you're facing
Include screenshots or links to provide context
Follow up on threads with updates or solutions you’ve discovered
Share your knowledge as you grow to help others
Even after you've mastered the basics, these communities can remain an invaluable resource. Regularly engaging with them ensures your skills stay sharp and keeps you connected to the latest in design and platform advancements.
5. Increase Project Difficulty Slowly
The best way to grow your skills is by taking it step by step. Start with the basics and work your way up to more challenging tasks. This approach helps you build confidence while avoiding burnout.
Start with Simple Layouts
Begin by designing clean, static layouts. Focus on organizing elements, perfecting spacing, and ensuring responsiveness. This will give you a solid grasp of layout structure and typography, which are essential building blocks for any project.
Add Complexity Gradually
Once you’re comfortable with basic layouts, challenge yourself by recreating existing websites or templates. Slowly introduce interactive features like hover effects and smooth transitions. This steady progression allows you to expand your abilities without feeling overwhelmed.
Practice to Build Confidence
Every project you complete strengthens your foundation and boosts your confidence. By starting small and gradually increasing the complexity, you’ll develop the practical skills needed to tackle advanced projects with ease.
6. Study Common Design Methods
Getting a handle on design fundamentals in tools like Webflow and Framer can make your learning curve much smoother. Start by focusing on these three key areas:
Responsive Design Fundamentals
Responsive design is all about creating layouts that adapt seamlessly across devices. Here's how you can structure your layouts effectively:
Desktop (992px and up): Stick to a 12-column grid system for clean, organized layouts.
Tablet (768–991px): Simplify the design with a 2-column layout for better usability.
Mobile (below 768px): Shift to a single-column stack to ensure everything fits neatly on smaller screens.
Both Webflow and Framer offer tools to handle these transitions, with Webflow using predefined breakpoints and Framer allowing custom ones. These practices also align with accessibility and performance goals.
Accessibility Best Practices
Good design is inclusive. Focus on these accessibility elements to ensure your designs work for everyone:
Accessibility Feature | How to Implement |
|---|---|
Color Contrast | Maintain a minimum 4.5:1 contrast ratio for text and backgrounds. |
Text Readability | Use a 16px base font and scale down slightly (to 14px) for mobile devices. |
Navigation | Make sure keyboard focus states are clear and functional. |
Accessibility isn’t just ethical - it also improves user experience for everyone. And when paired with performance optimization, it creates a seamless experience.
Performance Optimization
Fast-loading pages are non-negotiable. Here's how you can optimize performance:
Image Optimization
Compress images and size them appropriately. This simple step can reduce page weight by as much as 1MB.
Layout Efficiency
Speed matters. Research shows pages that load in 2 seconds experience a 9% bounce rate, compared to 38% for pages taking 5 seconds. In fact, half of users value speed over flashy animations.Mobile-First Approach
Start designing for the smallest screen first (320px Mobile Portrait breakpoint) and scale up. Mobile devices often take up to 70.9% longer to load pages compared to desktops, so efficient design is critical.
7. Practice Finding and Fixing Issues
Now that you've honed your design and performance optimization skills, it's time to focus on troubleshooting. Tackling problems effectively in Webflow and Framer means practicing with real-world scenarios. Here’s how you can sharpen your ability to spot and resolve design hiccups.
Built-in Testing Tools
Both Webflow and Framer come equipped with tools to help you debug like a pro. Webflow’s Audit panel automatically checks accessibility and ensures contrast ratios meet standards. On the other hand, Framer Motion has a debug mode that lets you visualize animation paths. To activate it, simply use this code snippet:
These tools are your first line of defense when it comes to performance testing.
Performance Optimization Workflow
Did you know that even a slight delay in load times can hurt conversion rates? Monitoring the right metrics can make all the difference. Here are the key areas to focus on:
Testing Phase | Key Metrics | Target Values |
|---|---|---|
Initial Load | First Contentful Paint | < 1.5 seconds |
Interaction | Time to Interactive | < 3.0 seconds |
Layout Stability | Cumulative Layout Shift | < 0.1 |
Make these metrics a regular part of your testing process to ensure your site performs at its best.
Real-World Success Stories
Case studies show that faster load times can drastically reduce bounce rates, proving how crucial performance optimization is for user retention.
Common Issues and Solutions
Here are some frequent problems and how to address them:
Image Optimization
Use native compression to significantly reduce file sizes.
Implement lazy loading for images that don’t need to load immediately.
Layout Consistency
Mobile (320px): Look for stacking issues in smaller screens.
Tablet (768px): Ensure smooth menu transitions.
Desktop (992px+): Double-check grid alignment.
Animation Performance
Aim for a framerate of 60fps for fluid transitions.
Use Framer Motion’s debug mode to pinpoint areas causing slowdowns.
Simplify animations that dip below 30fps.
Monthly Maintenance Checklist
Keep your projects running smoothly with a monthly testing routine:
Run Lighthouse audits to spot performance bottlenecks.
Monitor Core Web Vitals using built-in reporting tools.
Test responsive layouts on various devices.
Validate form submissions and interactive elements.
Why is this important? A whopping 82% of consumers say slow page speeds impact their buying decisions. By adopting these practices early, you’ll build the skills needed to create websites and apps that perform seamlessly.
For more advanced tips on debugging and optimization, check out the Webflow and Framer templates available at Offlens Studio. They’re a great resource to take your skills to the next level.
Conclusion
Becoming proficient in Webflow or Framer doesn’t happen overnight, but with consistent practice and the right approach, you can speed up your progress. The tips shared earlier, combined with hands-on experience, will help you move from beginner to expert more effectively.
Your journey can be broken down into clear stages, each building on the last. Here’s how your growth might look:
Learning Phase | Focus Area | Expected Outcome |
|---|---|---|
Foundation | Basic tools and layouts | Confidently navigating the platform |
Development | Official training and simple projects | Building functional components |
Advanced | Community engagement and complex features | Designing professional-level projects |
Mastery | Troubleshooting and optimization | Delivering polished, high-performing results |
The key to real progress is getting your hands dirty - experimenting, testing, and iterating. Along the way, professional resources can help bridge the gap between learning and execution. For example, Offlens Studio offers templates and guidance tailored for tools like Figma, Framer, and Webflow. These resources can help you turn your knowledge into professional-quality projects.
FAQs
What are the key differences between Webflow and Framer, and when should you use each?
Webflow and Framer are both excellent tools, but they cater to different needs depending on the type of project you're working on.
Webflow is perfect for building fully functional, responsive websites with plenty of customization options. It’s a go-to for designers who want to bring their ideas to life as production-ready websites - no extensive coding required. Plus, it offers seamless hosting integration, making it a solid choice for end-to-end website creation.
Framer, meanwhile, excels at creating interactive and visually rich prototypes or landing pages. It’s ideal for projects that need animations, micro-interactions, or user experience testing before diving into full-scale development.
So, how do you decide? If you’re aiming for a complete, polished website, Webflow is your tool. But if you’re focused on crafting dynamic prototypes or smaller, design-heavy projects, Framer is the better fit.
How can I use online communities to improve my skills in Webflow or Framer?
Online communities are an excellent way to dive deeper into Webflow or Framer. By joining spaces like forums, social media groups, or design-centric platforms, you can connect with seasoned users and fellow learners to swap tips, solve problems, and find creative inspiration.
Get involved by joining discussions, asking questions, or showcasing your projects to gather feedback. Many of these communities also offer tutorials, webinars, and challenges that can help you build your skills while keeping you motivated. Being part of these groups not only speeds up your learning process but also keeps you informed about the newest features and techniques for Webflow and Framer.
How can I troubleshoot performance issues in my Webflow or Framer projects?
To address performance issues in your Webflow or Framer projects, start by pinpointing elements that could be slowing things down. Start with images - compress them to minimize load times and ensure you're using the right file formats, like JPEG or PNG for static images and SVG for scalable graphics.
For animations, keep things simple. Limit the number of interactions happening at the same time and avoid overly intricate sequences that could bog down performance.
Next, take a closer look at your project settings. In Webflow, remove unused styles and unnecessary elements to avoid bloating your design. In Framer, focus on keeping components well-organized and avoid too much nesting, which can make your project harder to process.
Make it a habit to preview your project frequently. This lets you test its performance and tweak any problem areas before they become bigger issues. Clean, streamlined designs not only run better but also create a smoother experience for your users.
Related posts
The Ultimate Guide to Product Design for Startups
How to Use Webflow for Faster Design Processes
Webflow vs Framer: Ease of Use for Startups
Marketing
Jan 25, 2025
Master the Basics: Get familiar with tools like the Navigator Panel, Design Tools, and Canvas Area.
Use Official Resources: Start with Webflow University and Framer Learn for step-by-step tutorials.
Build Small Projects: Practice by creating simple websites like landing pages or contact forms.
Join Online Communities: Connect with Webflow and Framer forums to get advice, feedback, and inspiration.
Increase Complexity Gradually: Start with static layouts and slowly add animations, interactions, and responsive designs.
Learn Design Methods: Focus on responsive design, accessibility, and performance optimization.
Practice Troubleshooting: Use built-in testing tools to find and fix issues like layout bugs or slow load times.
Quick Comparison: Webflow vs. Framer
Feature | Webflow | Framer |
|---|---|---|
Learning Resources | Webflow University (100+ hours) | Framer Learn (interactive guides) |
Design Focus | Visual coding + responsive design | Prototyping + animations |
Best For | Polished websites | Interactive experiences |
Community | ||
Performance Tools | Audit panel | Debug mode for animations |
Pro Tip: Start small, practice consistently, and use community feedback to improve. Whether you’re a beginner or leveling up, these platforms can help you create professional-quality websites and apps.
Learn Framer For Beginners: Mini Course (2024)
1. Learn the Basic Tools and Layout
Getting comfortable with the basic tools and layout is the first step to creating an efficient design workflow. By understanding how the key features work together, you'll set yourself up for success in your design projects.
Key Areas to Know
Navigator Panel: Found on the left side, this is your go-to for organizing your workspace. It keeps all your elements neatly arranged for quick access.
Design Tools: Located on the right sidebar, these controls let you handle style settings, animations, breakpoints for responsive design, and even preview your work.
Canvas Area: This is the heart of your workspace. Here, you can:
Zoom, pan, and align elements with precision
Switch between desktop and mobile views
Preview interactions as you build them
Tips to Build Confidence with the Tools
Learn and use keyboard shortcuts - they’ll save you tons of time.
Keep your layers and components organized from the start to avoid confusion later.
Save your work often and use version control to track changes.
Spend time experimenting on a blank canvas. It’s a great way to build muscle memory and get a deeper understanding of the tools.
2. Use Official Training Materials
If you're serious about mastering Webflow or Framer, their official training materials should be your go-to resource.
Official Learning Paths
Both platforms provide structured courses to help you level up:
Webflow University: This free platform offers over 100 hours of video tutorials. You'll find everything from basic navigation to advanced animations and interactions.
Framer Learn: An interactive hub packed with tutorials, video guides, and hands-on exercises.
Once you’ve absorbed the lessons, put your knowledge to work through practice.
Getting the Most Out of Official Resources
Start with the foundational courses. These will guide you through essential skills like navigating the interface, creating components, responsive design, and animation basics. Stick to the recommended sequence to ensure you don’t miss any critical steps.
Add-On Learning Tools
While official resources are your main focus, you can deepen your understanding with these extras:
Documentation: The official docs are perfect for quick lookups and clarifications.
Templates: Study official templates to see how experts structure projects.
Community Projects: Browse showcase galleries to get inspired by real-world examples.
These supplementary tools help connect the dots between theory and hands-on application.
Practice Makes Perfect
Don’t just watch or read - practice! Complete every exercise to solidify your skills.
Pro Tip: Set up a dedicated practice project where you can freely experiment with the techniques you’re learning. It’s a safe space to try things out without the fear of messing up a live project.
3. Build Simple Test Projects
Once you've got the basics down, it's time to put your skills to work with small, manageable projects. These exercises will not only boost your confidence but also help you get a deeper understanding of key features in tools like Webflow or Framer.
Start with Straightforward Projects
Kick things off with simple ideas like a personal landing page, a product showcase, or a basic contact form. These types of projects are great for mastering core functionalities without feeling overwhelmed.
Set Realistic Deadlines
Sometimes, all it takes is focused effort to create something impressive in a short time. Offlens Studio has demonstrated this by completing a landing page project in less than 24 hours.
Louis (@louiss) shared his experience:
"I worked with them to launch my landing page. They said they could do the job in under 24 hours and that is exactly what they did. Super happy about the result, it's exactly what I wanted and described to them. 10/10 Would absolutely recommend them to build and launch landing pages."
Simplify Complex Features
When tackling more advanced features, break them into smaller, manageable steps:
Start with Structure: Build the basic layout to establish the framework.
Add Styling: Focus on typography, colors, and overall design aesthetics.
Implement Interactions: Introduce simple animations or hover effects.
Test Responsiveness: Make sure everything looks and works well on mobile devices.
Prioritize Quality Over Speed
While quick turnarounds can be impressive, taking the time to fully understand each feature will lead to better results in the long run.
Perrin (@perrrrrrin) praised a similar approach:
"They were absolutely amazing for the Figma and Framer work. They understood the task in one sentence, and got the job done in 12 hours!! I was expecting a few days but they really went above and beyond with speed and quality. Highly recommend them."
Stay Organized
Good organization is key to a smooth workflow. Use clear folder structures and consistently name your components. As you go, document what you learn and thoroughly test your work before moving on to the next step.
Once you’ve nailed a few basic projects, you can start pushing yourself with more complex challenges. Each step will bring you closer to mastering these tools.
4. Join Online Design Groups
Once you've got a handle on the tools and have started building projects, connecting with other designers can take your skills to the next level. Joining online design communities is a great way to sharpen your Webflow or Framer expertise while learning from others.
Where to Find Support
Online communities like the Webflow Forum and Framer Community are treasure troves of advice and inspiration. Here's what you can gain by being part of these groups:
Get help with technical questions
Share your work and receive constructive feedback
Learn best practices from experienced designers
Explore new techniques and platform features
Build connections with like-minded creatives
These spaces are perfect for solving problems quickly and learning actively through collaboration.
Making the Most of Community Resources
Dive in by introducing yourself and sharing your learning goals. This not only helps others understand how they can assist you but also lays the foundation for meaningful interactions. Posting your progress - complete with before-and-after examples or challenges you've tackled - can solidify your learning and inspire others.
Stay in the Loop with Platform Updates
One of the biggest perks of being part of these groups? Staying informed about platform updates and trends. Community discussions often highlight:
New feature rollouts and how to use them
Workflow changes caused by updates
Practical solutions for common issues
Insights into emerging design trends
By keeping up with these conversations, you can adapt quickly and stay ahead of the curve.
How to Engage Effectively
To get the most out of these communities, focus on meaningful participation. Here are some tips:
Clearly explain your goals or the challenges you're facing
Include screenshots or links to provide context
Follow up on threads with updates or solutions you’ve discovered
Share your knowledge as you grow to help others
Even after you've mastered the basics, these communities can remain an invaluable resource. Regularly engaging with them ensures your skills stay sharp and keeps you connected to the latest in design and platform advancements.
5. Increase Project Difficulty Slowly
The best way to grow your skills is by taking it step by step. Start with the basics and work your way up to more challenging tasks. This approach helps you build confidence while avoiding burnout.
Start with Simple Layouts
Begin by designing clean, static layouts. Focus on organizing elements, perfecting spacing, and ensuring responsiveness. This will give you a solid grasp of layout structure and typography, which are essential building blocks for any project.
Add Complexity Gradually
Once you’re comfortable with basic layouts, challenge yourself by recreating existing websites or templates. Slowly introduce interactive features like hover effects and smooth transitions. This steady progression allows you to expand your abilities without feeling overwhelmed.
Practice to Build Confidence
Every project you complete strengthens your foundation and boosts your confidence. By starting small and gradually increasing the complexity, you’ll develop the practical skills needed to tackle advanced projects with ease.
6. Study Common Design Methods
Getting a handle on design fundamentals in tools like Webflow and Framer can make your learning curve much smoother. Start by focusing on these three key areas:
Responsive Design Fundamentals
Responsive design is all about creating layouts that adapt seamlessly across devices. Here's how you can structure your layouts effectively:
Desktop (992px and up): Stick to a 12-column grid system for clean, organized layouts.
Tablet (768–991px): Simplify the design with a 2-column layout for better usability.
Mobile (below 768px): Shift to a single-column stack to ensure everything fits neatly on smaller screens.
Both Webflow and Framer offer tools to handle these transitions, with Webflow using predefined breakpoints and Framer allowing custom ones. These practices also align with accessibility and performance goals.
Accessibility Best Practices
Good design is inclusive. Focus on these accessibility elements to ensure your designs work for everyone:
Accessibility Feature | How to Implement |
|---|---|
Color Contrast | Maintain a minimum 4.5:1 contrast ratio for text and backgrounds. |
Text Readability | Use a 16px base font and scale down slightly (to 14px) for mobile devices. |
Navigation | Make sure keyboard focus states are clear and functional. |
Accessibility isn’t just ethical - it also improves user experience for everyone. And when paired with performance optimization, it creates a seamless experience.
Performance Optimization
Fast-loading pages are non-negotiable. Here's how you can optimize performance:
Image Optimization
Compress images and size them appropriately. This simple step can reduce page weight by as much as 1MB.
Layout Efficiency
Speed matters. Research shows pages that load in 2 seconds experience a 9% bounce rate, compared to 38% for pages taking 5 seconds. In fact, half of users value speed over flashy animations.Mobile-First Approach
Start designing for the smallest screen first (320px Mobile Portrait breakpoint) and scale up. Mobile devices often take up to 70.9% longer to load pages compared to desktops, so efficient design is critical.
7. Practice Finding and Fixing Issues
Now that you've honed your design and performance optimization skills, it's time to focus on troubleshooting. Tackling problems effectively in Webflow and Framer means practicing with real-world scenarios. Here’s how you can sharpen your ability to spot and resolve design hiccups.
Built-in Testing Tools
Both Webflow and Framer come equipped with tools to help you debug like a pro. Webflow’s Audit panel automatically checks accessibility and ensures contrast ratios meet standards. On the other hand, Framer Motion has a debug mode that lets you visualize animation paths. To activate it, simply use this code snippet:
These tools are your first line of defense when it comes to performance testing.
Performance Optimization Workflow
Did you know that even a slight delay in load times can hurt conversion rates? Monitoring the right metrics can make all the difference. Here are the key areas to focus on:
Testing Phase | Key Metrics | Target Values |
|---|---|---|
Initial Load | First Contentful Paint | < 1.5 seconds |
Interaction | Time to Interactive | < 3.0 seconds |
Layout Stability | Cumulative Layout Shift | < 0.1 |
Make these metrics a regular part of your testing process to ensure your site performs at its best.
Real-World Success Stories
Case studies show that faster load times can drastically reduce bounce rates, proving how crucial performance optimization is for user retention.
Common Issues and Solutions
Here are some frequent problems and how to address them:
Image Optimization
Use native compression to significantly reduce file sizes.
Implement lazy loading for images that don’t need to load immediately.
Layout Consistency
Mobile (320px): Look for stacking issues in smaller screens.
Tablet (768px): Ensure smooth menu transitions.
Desktop (992px+): Double-check grid alignment.
Animation Performance
Aim for a framerate of 60fps for fluid transitions.
Use Framer Motion’s debug mode to pinpoint areas causing slowdowns.
Simplify animations that dip below 30fps.
Monthly Maintenance Checklist
Keep your projects running smoothly with a monthly testing routine:
Run Lighthouse audits to spot performance bottlenecks.
Monitor Core Web Vitals using built-in reporting tools.
Test responsive layouts on various devices.
Validate form submissions and interactive elements.
Why is this important? A whopping 82% of consumers say slow page speeds impact their buying decisions. By adopting these practices early, you’ll build the skills needed to create websites and apps that perform seamlessly.
For more advanced tips on debugging and optimization, check out the Webflow and Framer templates available at Offlens Studio. They’re a great resource to take your skills to the next level.
Conclusion
Becoming proficient in Webflow or Framer doesn’t happen overnight, but with consistent practice and the right approach, you can speed up your progress. The tips shared earlier, combined with hands-on experience, will help you move from beginner to expert more effectively.
Your journey can be broken down into clear stages, each building on the last. Here’s how your growth might look:
Learning Phase | Focus Area | Expected Outcome |
|---|---|---|
Foundation | Basic tools and layouts | Confidently navigating the platform |
Development | Official training and simple projects | Building functional components |
Advanced | Community engagement and complex features | Designing professional-level projects |
Mastery | Troubleshooting and optimization | Delivering polished, high-performing results |
The key to real progress is getting your hands dirty - experimenting, testing, and iterating. Along the way, professional resources can help bridge the gap between learning and execution. For example, Offlens Studio offers templates and guidance tailored for tools like Figma, Framer, and Webflow. These resources can help you turn your knowledge into professional-quality projects.
FAQs
What are the key differences between Webflow and Framer, and when should you use each?
Webflow and Framer are both excellent tools, but they cater to different needs depending on the type of project you're working on.
Webflow is perfect for building fully functional, responsive websites with plenty of customization options. It’s a go-to for designers who want to bring their ideas to life as production-ready websites - no extensive coding required. Plus, it offers seamless hosting integration, making it a solid choice for end-to-end website creation.
Framer, meanwhile, excels at creating interactive and visually rich prototypes or landing pages. It’s ideal for projects that need animations, micro-interactions, or user experience testing before diving into full-scale development.
So, how do you decide? If you’re aiming for a complete, polished website, Webflow is your tool. But if you’re focused on crafting dynamic prototypes or smaller, design-heavy projects, Framer is the better fit.
How can I use online communities to improve my skills in Webflow or Framer?
Online communities are an excellent way to dive deeper into Webflow or Framer. By joining spaces like forums, social media groups, or design-centric platforms, you can connect with seasoned users and fellow learners to swap tips, solve problems, and find creative inspiration.
Get involved by joining discussions, asking questions, or showcasing your projects to gather feedback. Many of these communities also offer tutorials, webinars, and challenges that can help you build your skills while keeping you motivated. Being part of these groups not only speeds up your learning process but also keeps you informed about the newest features and techniques for Webflow and Framer.
How can I troubleshoot performance issues in my Webflow or Framer projects?
To address performance issues in your Webflow or Framer projects, start by pinpointing elements that could be slowing things down. Start with images - compress them to minimize load times and ensure you're using the right file formats, like JPEG or PNG for static images and SVG for scalable graphics.
For animations, keep things simple. Limit the number of interactions happening at the same time and avoid overly intricate sequences that could bog down performance.
Next, take a closer look at your project settings. In Webflow, remove unused styles and unnecessary elements to avoid bloating your design. In Framer, focus on keeping components well-organized and avoid too much nesting, which can make your project harder to process.
Make it a habit to preview your project frequently. This lets you test its performance and tweak any problem areas before they become bigger issues. Clean, streamlined designs not only run better but also create a smoother experience for your users.
Related posts
The Ultimate Guide to Product Design for Startups
How to Use Webflow for Faster Design Processes
Webflow vs Framer: Ease of Use for Startups
Marketing
Jan 26, 2025
Master the Basics: Get familiar with tools like the Navigator Panel, Design Tools, and Canvas Area.
Use Official Resources: Start with Webflow University and Framer Learn for step-by-step tutorials.
Build Small Projects: Practice by creating simple websites like landing pages or contact forms.
Join Online Communities: Connect with Webflow and Framer forums to get advice, feedback, and inspiration.
Increase Complexity Gradually: Start with static layouts and slowly add animations, interactions, and responsive designs.
Learn Design Methods: Focus on responsive design, accessibility, and performance optimization.
Practice Troubleshooting: Use built-in testing tools to find and fix issues like layout bugs or slow load times.
Quick Comparison: Webflow vs. Framer
Feature | Webflow | Framer |
|---|---|---|
Learning Resources | Webflow University (100+ hours) | Framer Learn (interactive guides) |
Design Focus | Visual coding + responsive design | Prototyping + animations |
Best For | Polished websites | Interactive experiences |
Community | ||
Performance Tools | Audit panel | Debug mode for animations |
Pro Tip: Start small, practice consistently, and use community feedback to improve. Whether you’re a beginner or leveling up, these platforms can help you create professional-quality websites and apps.
Learn Framer For Beginners: Mini Course (2024)
1. Learn the Basic Tools and Layout
Getting comfortable with the basic tools and layout is the first step to creating an efficient design workflow. By understanding how the key features work together, you'll set yourself up for success in your design projects.
Key Areas to Know
Navigator Panel: Found on the left side, this is your go-to for organizing your workspace. It keeps all your elements neatly arranged for quick access.
Design Tools: Located on the right sidebar, these controls let you handle style settings, animations, breakpoints for responsive design, and even preview your work.
Canvas Area: This is the heart of your workspace. Here, you can:
Zoom, pan, and align elements with precision
Switch between desktop and mobile views
Preview interactions as you build them
Tips to Build Confidence with the Tools
Learn and use keyboard shortcuts - they’ll save you tons of time.
Keep your layers and components organized from the start to avoid confusion later.
Save your work often and use version control to track changes.
Spend time experimenting on a blank canvas. It’s a great way to build muscle memory and get a deeper understanding of the tools.
2. Use Official Training Materials
If you're serious about mastering Webflow or Framer, their official training materials should be your go-to resource.
Official Learning Paths
Both platforms provide structured courses to help you level up:
Webflow University: This free platform offers over 100 hours of video tutorials. You'll find everything from basic navigation to advanced animations and interactions.
Framer Learn: An interactive hub packed with tutorials, video guides, and hands-on exercises.
Once you’ve absorbed the lessons, put your knowledge to work through practice.
Getting the Most Out of Official Resources
Start with the foundational courses. These will guide you through essential skills like navigating the interface, creating components, responsive design, and animation basics. Stick to the recommended sequence to ensure you don’t miss any critical steps.
Add-On Learning Tools
While official resources are your main focus, you can deepen your understanding with these extras:
Documentation: The official docs are perfect for quick lookups and clarifications.
Templates: Study official templates to see how experts structure projects.
Community Projects: Browse showcase galleries to get inspired by real-world examples.
These supplementary tools help connect the dots between theory and hands-on application.
Practice Makes Perfect
Don’t just watch or read - practice! Complete every exercise to solidify your skills.
Pro Tip: Set up a dedicated practice project where you can freely experiment with the techniques you’re learning. It’s a safe space to try things out without the fear of messing up a live project.
3. Build Simple Test Projects
Once you've got the basics down, it's time to put your skills to work with small, manageable projects. These exercises will not only boost your confidence but also help you get a deeper understanding of key features in tools like Webflow or Framer.
Start with Straightforward Projects
Kick things off with simple ideas like a personal landing page, a product showcase, or a basic contact form. These types of projects are great for mastering core functionalities without feeling overwhelmed.
Set Realistic Deadlines
Sometimes, all it takes is focused effort to create something impressive in a short time. Offlens Studio has demonstrated this by completing a landing page project in less than 24 hours.
Louis (@louiss) shared his experience:
"I worked with them to launch my landing page. They said they could do the job in under 24 hours and that is exactly what they did. Super happy about the result, it's exactly what I wanted and described to them. 10/10 Would absolutely recommend them to build and launch landing pages."
Simplify Complex Features
When tackling more advanced features, break them into smaller, manageable steps:
Start with Structure: Build the basic layout to establish the framework.
Add Styling: Focus on typography, colors, and overall design aesthetics.
Implement Interactions: Introduce simple animations or hover effects.
Test Responsiveness: Make sure everything looks and works well on mobile devices.
Prioritize Quality Over Speed
While quick turnarounds can be impressive, taking the time to fully understand each feature will lead to better results in the long run.
Perrin (@perrrrrrin) praised a similar approach:
"They were absolutely amazing for the Figma and Framer work. They understood the task in one sentence, and got the job done in 12 hours!! I was expecting a few days but they really went above and beyond with speed and quality. Highly recommend them."
Stay Organized
Good organization is key to a smooth workflow. Use clear folder structures and consistently name your components. As you go, document what you learn and thoroughly test your work before moving on to the next step.
Once you’ve nailed a few basic projects, you can start pushing yourself with more complex challenges. Each step will bring you closer to mastering these tools.
4. Join Online Design Groups
Once you've got a handle on the tools and have started building projects, connecting with other designers can take your skills to the next level. Joining online design communities is a great way to sharpen your Webflow or Framer expertise while learning from others.
Where to Find Support
Online communities like the Webflow Forum and Framer Community are treasure troves of advice and inspiration. Here's what you can gain by being part of these groups:
Get help with technical questions
Share your work and receive constructive feedback
Learn best practices from experienced designers
Explore new techniques and platform features
Build connections with like-minded creatives
These spaces are perfect for solving problems quickly and learning actively through collaboration.
Making the Most of Community Resources
Dive in by introducing yourself and sharing your learning goals. This not only helps others understand how they can assist you but also lays the foundation for meaningful interactions. Posting your progress - complete with before-and-after examples or challenges you've tackled - can solidify your learning and inspire others.
Stay in the Loop with Platform Updates
One of the biggest perks of being part of these groups? Staying informed about platform updates and trends. Community discussions often highlight:
New feature rollouts and how to use them
Workflow changes caused by updates
Practical solutions for common issues
Insights into emerging design trends
By keeping up with these conversations, you can adapt quickly and stay ahead of the curve.
How to Engage Effectively
To get the most out of these communities, focus on meaningful participation. Here are some tips:
Clearly explain your goals or the challenges you're facing
Include screenshots or links to provide context
Follow up on threads with updates or solutions you’ve discovered
Share your knowledge as you grow to help others
Even after you've mastered the basics, these communities can remain an invaluable resource. Regularly engaging with them ensures your skills stay sharp and keeps you connected to the latest in design and platform advancements.
5. Increase Project Difficulty Slowly
The best way to grow your skills is by taking it step by step. Start with the basics and work your way up to more challenging tasks. This approach helps you build confidence while avoiding burnout.
Start with Simple Layouts
Begin by designing clean, static layouts. Focus on organizing elements, perfecting spacing, and ensuring responsiveness. This will give you a solid grasp of layout structure and typography, which are essential building blocks for any project.
Add Complexity Gradually
Once you’re comfortable with basic layouts, challenge yourself by recreating existing websites or templates. Slowly introduce interactive features like hover effects and smooth transitions. This steady progression allows you to expand your abilities without feeling overwhelmed.
Practice to Build Confidence
Every project you complete strengthens your foundation and boosts your confidence. By starting small and gradually increasing the complexity, you’ll develop the practical skills needed to tackle advanced projects with ease.
6. Study Common Design Methods
Getting a handle on design fundamentals in tools like Webflow and Framer can make your learning curve much smoother. Start by focusing on these three key areas:
Responsive Design Fundamentals
Responsive design is all about creating layouts that adapt seamlessly across devices. Here's how you can structure your layouts effectively:
Desktop (992px and up): Stick to a 12-column grid system for clean, organized layouts.
Tablet (768–991px): Simplify the design with a 2-column layout for better usability.
Mobile (below 768px): Shift to a single-column stack to ensure everything fits neatly on smaller screens.
Both Webflow and Framer offer tools to handle these transitions, with Webflow using predefined breakpoints and Framer allowing custom ones. These practices also align with accessibility and performance goals.
Accessibility Best Practices
Good design is inclusive. Focus on these accessibility elements to ensure your designs work for everyone:
Accessibility Feature | How to Implement |
|---|---|
Color Contrast | Maintain a minimum 4.5:1 contrast ratio for text and backgrounds. |
Text Readability | Use a 16px base font and scale down slightly (to 14px) for mobile devices. |
Navigation | Make sure keyboard focus states are clear and functional. |
Accessibility isn’t just ethical - it also improves user experience for everyone. And when paired with performance optimization, it creates a seamless experience.
Performance Optimization
Fast-loading pages are non-negotiable. Here's how you can optimize performance:
Image Optimization
Compress images and size them appropriately. This simple step can reduce page weight by as much as 1MB.
Layout Efficiency
Speed matters. Research shows pages that load in 2 seconds experience a 9% bounce rate, compared to 38% for pages taking 5 seconds. In fact, half of users value speed over flashy animations.Mobile-First Approach
Start designing for the smallest screen first (320px Mobile Portrait breakpoint) and scale up. Mobile devices often take up to 70.9% longer to load pages compared to desktops, so efficient design is critical.
7. Practice Finding and Fixing Issues
Now that you've honed your design and performance optimization skills, it's time to focus on troubleshooting. Tackling problems effectively in Webflow and Framer means practicing with real-world scenarios. Here’s how you can sharpen your ability to spot and resolve design hiccups.
Built-in Testing Tools
Both Webflow and Framer come equipped with tools to help you debug like a pro. Webflow’s Audit panel automatically checks accessibility and ensures contrast ratios meet standards. On the other hand, Framer Motion has a debug mode that lets you visualize animation paths. To activate it, simply use this code snippet:
These tools are your first line of defense when it comes to performance testing.
Performance Optimization Workflow
Did you know that even a slight delay in load times can hurt conversion rates? Monitoring the right metrics can make all the difference. Here are the key areas to focus on:
Testing Phase | Key Metrics | Target Values |
|---|---|---|
Initial Load | First Contentful Paint | < 1.5 seconds |
Interaction | Time to Interactive | < 3.0 seconds |
Layout Stability | Cumulative Layout Shift | < 0.1 |
Make these metrics a regular part of your testing process to ensure your site performs at its best.
Real-World Success Stories
Case studies show that faster load times can drastically reduce bounce rates, proving how crucial performance optimization is for user retention.
Common Issues and Solutions
Here are some frequent problems and how to address them:
Image Optimization
Use native compression to significantly reduce file sizes.
Implement lazy loading for images that don’t need to load immediately.
Layout Consistency
Mobile (320px): Look for stacking issues in smaller screens.
Tablet (768px): Ensure smooth menu transitions.
Desktop (992px+): Double-check grid alignment.
Animation Performance
Aim for a framerate of 60fps for fluid transitions.
Use Framer Motion’s debug mode to pinpoint areas causing slowdowns.
Simplify animations that dip below 30fps.
Monthly Maintenance Checklist
Keep your projects running smoothly with a monthly testing routine:
Run Lighthouse audits to spot performance bottlenecks.
Monitor Core Web Vitals using built-in reporting tools.
Test responsive layouts on various devices.
Validate form submissions and interactive elements.
Why is this important? A whopping 82% of consumers say slow page speeds impact their buying decisions. By adopting these practices early, you’ll build the skills needed to create websites and apps that perform seamlessly.
For more advanced tips on debugging and optimization, check out the Webflow and Framer templates available at Offlens Studio. They’re a great resource to take your skills to the next level.
Conclusion
Becoming proficient in Webflow or Framer doesn’t happen overnight, but with consistent practice and the right approach, you can speed up your progress. The tips shared earlier, combined with hands-on experience, will help you move from beginner to expert more effectively.
Your journey can be broken down into clear stages, each building on the last. Here’s how your growth might look:
Learning Phase | Focus Area | Expected Outcome |
|---|---|---|
Foundation | Basic tools and layouts | Confidently navigating the platform |
Development | Official training and simple projects | Building functional components |
Advanced | Community engagement and complex features | Designing professional-level projects |
Mastery | Troubleshooting and optimization | Delivering polished, high-performing results |
The key to real progress is getting your hands dirty - experimenting, testing, and iterating. Along the way, professional resources can help bridge the gap between learning and execution. For example, Offlens Studio offers templates and guidance tailored for tools like Figma, Framer, and Webflow. These resources can help you turn your knowledge into professional-quality projects.
FAQs
What are the key differences between Webflow and Framer, and when should you use each?
Webflow and Framer are both excellent tools, but they cater to different needs depending on the type of project you're working on.
Webflow is perfect for building fully functional, responsive websites with plenty of customization options. It’s a go-to for designers who want to bring their ideas to life as production-ready websites - no extensive coding required. Plus, it offers seamless hosting integration, making it a solid choice for end-to-end website creation.
Framer, meanwhile, excels at creating interactive and visually rich prototypes or landing pages. It’s ideal for projects that need animations, micro-interactions, or user experience testing before diving into full-scale development.
So, how do you decide? If you’re aiming for a complete, polished website, Webflow is your tool. But if you’re focused on crafting dynamic prototypes or smaller, design-heavy projects, Framer is the better fit.
How can I use online communities to improve my skills in Webflow or Framer?
Online communities are an excellent way to dive deeper into Webflow or Framer. By joining spaces like forums, social media groups, or design-centric platforms, you can connect with seasoned users and fellow learners to swap tips, solve problems, and find creative inspiration.
Get involved by joining discussions, asking questions, or showcasing your projects to gather feedback. Many of these communities also offer tutorials, webinars, and challenges that can help you build your skills while keeping you motivated. Being part of these groups not only speeds up your learning process but also keeps you informed about the newest features and techniques for Webflow and Framer.
How can I troubleshoot performance issues in my Webflow or Framer projects?
To address performance issues in your Webflow or Framer projects, start by pinpointing elements that could be slowing things down. Start with images - compress them to minimize load times and ensure you're using the right file formats, like JPEG or PNG for static images and SVG for scalable graphics.
For animations, keep things simple. Limit the number of interactions happening at the same time and avoid overly intricate sequences that could bog down performance.
Next, take a closer look at your project settings. In Webflow, remove unused styles and unnecessary elements to avoid bloating your design. In Framer, focus on keeping components well-organized and avoid too much nesting, which can make your project harder to process.
Make it a habit to preview your project frequently. This lets you test its performance and tweak any problem areas before they become bigger issues. Clean, streamlined designs not only run better but also create a smoother experience for your users.
Related posts
The Ultimate Guide to Product Design for Startups
How to Use Webflow for Faster Design Processes
Webflow vs Framer: Ease of Use for Startups
Marketing
Jan 24, 2025
Master the Basics: Get familiar with tools like the Navigator Panel, Design Tools, and Canvas Area.
Use Official Resources: Start with Webflow University and Framer Learn for step-by-step tutorials.
Build Small Projects: Practice by creating simple websites like landing pages or contact forms.
Join Online Communities: Connect with Webflow and Framer forums to get advice, feedback, and inspiration.
Increase Complexity Gradually: Start with static layouts and slowly add animations, interactions, and responsive designs.
Learn Design Methods: Focus on responsive design, accessibility, and performance optimization.
Practice Troubleshooting: Use built-in testing tools to find and fix issues like layout bugs or slow load times.
Quick Comparison: Webflow vs. Framer
Feature | Webflow | Framer |
|---|---|---|
Learning Resources | Webflow University (100+ hours) | Framer Learn (interactive guides) |
Design Focus | Visual coding + responsive design | Prototyping + animations |
Best For | Polished websites | Interactive experiences |
Community | ||
Performance Tools | Audit panel | Debug mode for animations |
Pro Tip: Start small, practice consistently, and use community feedback to improve. Whether you’re a beginner or leveling up, these platforms can help you create professional-quality websites and apps.
Learn Framer For Beginners: Mini Course (2024)
1. Learn the Basic Tools and Layout
Getting comfortable with the basic tools and layout is the first step to creating an efficient design workflow. By understanding how the key features work together, you'll set yourself up for success in your design projects.
Key Areas to Know
Navigator Panel: Found on the left side, this is your go-to for organizing your workspace. It keeps all your elements neatly arranged for quick access.
Design Tools: Located on the right sidebar, these controls let you handle style settings, animations, breakpoints for responsive design, and even preview your work.
Canvas Area: This is the heart of your workspace. Here, you can:
Zoom, pan, and align elements with precision
Switch between desktop and mobile views
Preview interactions as you build them
Tips to Build Confidence with the Tools
Learn and use keyboard shortcuts - they’ll save you tons of time.
Keep your layers and components organized from the start to avoid confusion later.
Save your work often and use version control to track changes.
Spend time experimenting on a blank canvas. It’s a great way to build muscle memory and get a deeper understanding of the tools.
2. Use Official Training Materials
If you're serious about mastering Webflow or Framer, their official training materials should be your go-to resource.
Official Learning Paths
Both platforms provide structured courses to help you level up:
Webflow University: This free platform offers over 100 hours of video tutorials. You'll find everything from basic navigation to advanced animations and interactions.
Framer Learn: An interactive hub packed with tutorials, video guides, and hands-on exercises.
Once you’ve absorbed the lessons, put your knowledge to work through practice.
Getting the Most Out of Official Resources
Start with the foundational courses. These will guide you through essential skills like navigating the interface, creating components, responsive design, and animation basics. Stick to the recommended sequence to ensure you don’t miss any critical steps.
Add-On Learning Tools
While official resources are your main focus, you can deepen your understanding with these extras:
Documentation: The official docs are perfect for quick lookups and clarifications.
Templates: Study official templates to see how experts structure projects.
Community Projects: Browse showcase galleries to get inspired by real-world examples.
These supplementary tools help connect the dots between theory and hands-on application.
Practice Makes Perfect
Don’t just watch or read - practice! Complete every exercise to solidify your skills.
Pro Tip: Set up a dedicated practice project where you can freely experiment with the techniques you’re learning. It’s a safe space to try things out without the fear of messing up a live project.
3. Build Simple Test Projects
Once you've got the basics down, it's time to put your skills to work with small, manageable projects. These exercises will not only boost your confidence but also help you get a deeper understanding of key features in tools like Webflow or Framer.
Start with Straightforward Projects
Kick things off with simple ideas like a personal landing page, a product showcase, or a basic contact form. These types of projects are great for mastering core functionalities without feeling overwhelmed.
Set Realistic Deadlines
Sometimes, all it takes is focused effort to create something impressive in a short time. Offlens Studio has demonstrated this by completing a landing page project in less than 24 hours.
Louis (@louiss) shared his experience:
"I worked with them to launch my landing page. They said they could do the job in under 24 hours and that is exactly what they did. Super happy about the result, it's exactly what I wanted and described to them. 10/10 Would absolutely recommend them to build and launch landing pages."
Simplify Complex Features
When tackling more advanced features, break them into smaller, manageable steps:
Start with Structure: Build the basic layout to establish the framework.
Add Styling: Focus on typography, colors, and overall design aesthetics.
Implement Interactions: Introduce simple animations or hover effects.
Test Responsiveness: Make sure everything looks and works well on mobile devices.
Prioritize Quality Over Speed
While quick turnarounds can be impressive, taking the time to fully understand each feature will lead to better results in the long run.
Perrin (@perrrrrrin) praised a similar approach:
"They were absolutely amazing for the Figma and Framer work. They understood the task in one sentence, and got the job done in 12 hours!! I was expecting a few days but they really went above and beyond with speed and quality. Highly recommend them."
Stay Organized
Good organization is key to a smooth workflow. Use clear folder structures and consistently name your components. As you go, document what you learn and thoroughly test your work before moving on to the next step.
Once you’ve nailed a few basic projects, you can start pushing yourself with more complex challenges. Each step will bring you closer to mastering these tools.
4. Join Online Design Groups
Once you've got a handle on the tools and have started building projects, connecting with other designers can take your skills to the next level. Joining online design communities is a great way to sharpen your Webflow or Framer expertise while learning from others.
Where to Find Support
Online communities like the Webflow Forum and Framer Community are treasure troves of advice and inspiration. Here's what you can gain by being part of these groups:
Get help with technical questions
Share your work and receive constructive feedback
Learn best practices from experienced designers
Explore new techniques and platform features
Build connections with like-minded creatives
These spaces are perfect for solving problems quickly and learning actively through collaboration.
Making the Most of Community Resources
Dive in by introducing yourself and sharing your learning goals. This not only helps others understand how they can assist you but also lays the foundation for meaningful interactions. Posting your progress - complete with before-and-after examples or challenges you've tackled - can solidify your learning and inspire others.
Stay in the Loop with Platform Updates
One of the biggest perks of being part of these groups? Staying informed about platform updates and trends. Community discussions often highlight:
New feature rollouts and how to use them
Workflow changes caused by updates
Practical solutions for common issues
Insights into emerging design trends
By keeping up with these conversations, you can adapt quickly and stay ahead of the curve.
How to Engage Effectively
To get the most out of these communities, focus on meaningful participation. Here are some tips:
Clearly explain your goals or the challenges you're facing
Include screenshots or links to provide context
Follow up on threads with updates or solutions you’ve discovered
Share your knowledge as you grow to help others
Even after you've mastered the basics, these communities can remain an invaluable resource. Regularly engaging with them ensures your skills stay sharp and keeps you connected to the latest in design and platform advancements.
5. Increase Project Difficulty Slowly
The best way to grow your skills is by taking it step by step. Start with the basics and work your way up to more challenging tasks. This approach helps you build confidence while avoiding burnout.
Start with Simple Layouts
Begin by designing clean, static layouts. Focus on organizing elements, perfecting spacing, and ensuring responsiveness. This will give you a solid grasp of layout structure and typography, which are essential building blocks for any project.
Add Complexity Gradually
Once you’re comfortable with basic layouts, challenge yourself by recreating existing websites or templates. Slowly introduce interactive features like hover effects and smooth transitions. This steady progression allows you to expand your abilities without feeling overwhelmed.
Practice to Build Confidence
Every project you complete strengthens your foundation and boosts your confidence. By starting small and gradually increasing the complexity, you’ll develop the practical skills needed to tackle advanced projects with ease.
6. Study Common Design Methods
Getting a handle on design fundamentals in tools like Webflow and Framer can make your learning curve much smoother. Start by focusing on these three key areas:
Responsive Design Fundamentals
Responsive design is all about creating layouts that adapt seamlessly across devices. Here's how you can structure your layouts effectively:
Desktop (992px and up): Stick to a 12-column grid system for clean, organized layouts.
Tablet (768–991px): Simplify the design with a 2-column layout for better usability.
Mobile (below 768px): Shift to a single-column stack to ensure everything fits neatly on smaller screens.
Both Webflow and Framer offer tools to handle these transitions, with Webflow using predefined breakpoints and Framer allowing custom ones. These practices also align with accessibility and performance goals.
Accessibility Best Practices
Good design is inclusive. Focus on these accessibility elements to ensure your designs work for everyone:
Accessibility Feature | How to Implement |
|---|---|
Color Contrast | Maintain a minimum 4.5:1 contrast ratio for text and backgrounds. |
Text Readability | Use a 16px base font and scale down slightly (to 14px) for mobile devices. |
Navigation | Make sure keyboard focus states are clear and functional. |
Accessibility isn’t just ethical - it also improves user experience for everyone. And when paired with performance optimization, it creates a seamless experience.
Performance Optimization
Fast-loading pages are non-negotiable. Here's how you can optimize performance:
Image Optimization
Compress images and size them appropriately. This simple step can reduce page weight by as much as 1MB.
Layout Efficiency
Speed matters. Research shows pages that load in 2 seconds experience a 9% bounce rate, compared to 38% for pages taking 5 seconds. In fact, half of users value speed over flashy animations.Mobile-First Approach
Start designing for the smallest screen first (320px Mobile Portrait breakpoint) and scale up. Mobile devices often take up to 70.9% longer to load pages compared to desktops, so efficient design is critical.
7. Practice Finding and Fixing Issues
Now that you've honed your design and performance optimization skills, it's time to focus on troubleshooting. Tackling problems effectively in Webflow and Framer means practicing with real-world scenarios. Here’s how you can sharpen your ability to spot and resolve design hiccups.
Built-in Testing Tools
Both Webflow and Framer come equipped with tools to help you debug like a pro. Webflow’s Audit panel automatically checks accessibility and ensures contrast ratios meet standards. On the other hand, Framer Motion has a debug mode that lets you visualize animation paths. To activate it, simply use this code snippet:
These tools are your first line of defense when it comes to performance testing.
Performance Optimization Workflow
Did you know that even a slight delay in load times can hurt conversion rates? Monitoring the right metrics can make all the difference. Here are the key areas to focus on:
Testing Phase | Key Metrics | Target Values |
|---|---|---|
Initial Load | First Contentful Paint | < 1.5 seconds |
Interaction | Time to Interactive | < 3.0 seconds |
Layout Stability | Cumulative Layout Shift | < 0.1 |
Make these metrics a regular part of your testing process to ensure your site performs at its best.
Real-World Success Stories
Case studies show that faster load times can drastically reduce bounce rates, proving how crucial performance optimization is for user retention.
Common Issues and Solutions
Here are some frequent problems and how to address them:
Image Optimization
Use native compression to significantly reduce file sizes.
Implement lazy loading for images that don’t need to load immediately.
Layout Consistency
Mobile (320px): Look for stacking issues in smaller screens.
Tablet (768px): Ensure smooth menu transitions.
Desktop (992px+): Double-check grid alignment.
Animation Performance
Aim for a framerate of 60fps for fluid transitions.
Use Framer Motion’s debug mode to pinpoint areas causing slowdowns.
Simplify animations that dip below 30fps.
Monthly Maintenance Checklist
Keep your projects running smoothly with a monthly testing routine:
Run Lighthouse audits to spot performance bottlenecks.
Monitor Core Web Vitals using built-in reporting tools.
Test responsive layouts on various devices.
Validate form submissions and interactive elements.
Why is this important? A whopping 82% of consumers say slow page speeds impact their buying decisions. By adopting these practices early, you’ll build the skills needed to create websites and apps that perform seamlessly.
For more advanced tips on debugging and optimization, check out the Webflow and Framer templates available at Offlens Studio. They’re a great resource to take your skills to the next level.
Conclusion
Becoming proficient in Webflow or Framer doesn’t happen overnight, but with consistent practice and the right approach, you can speed up your progress. The tips shared earlier, combined with hands-on experience, will help you move from beginner to expert more effectively.
Your journey can be broken down into clear stages, each building on the last. Here’s how your growth might look:
Learning Phase | Focus Area | Expected Outcome |
|---|---|---|
Foundation | Basic tools and layouts | Confidently navigating the platform |
Development | Official training and simple projects | Building functional components |
Advanced | Community engagement and complex features | Designing professional-level projects |
Mastery | Troubleshooting and optimization | Delivering polished, high-performing results |
The key to real progress is getting your hands dirty - experimenting, testing, and iterating. Along the way, professional resources can help bridge the gap between learning and execution. For example, Offlens Studio offers templates and guidance tailored for tools like Figma, Framer, and Webflow. These resources can help you turn your knowledge into professional-quality projects.
FAQs
What are the key differences between Webflow and Framer, and when should you use each?
Webflow and Framer are both excellent tools, but they cater to different needs depending on the type of project you're working on.
Webflow is perfect for building fully functional, responsive websites with plenty of customization options. It’s a go-to for designers who want to bring their ideas to life as production-ready websites - no extensive coding required. Plus, it offers seamless hosting integration, making it a solid choice for end-to-end website creation.
Framer, meanwhile, excels at creating interactive and visually rich prototypes or landing pages. It’s ideal for projects that need animations, micro-interactions, or user experience testing before diving into full-scale development.
So, how do you decide? If you’re aiming for a complete, polished website, Webflow is your tool. But if you’re focused on crafting dynamic prototypes or smaller, design-heavy projects, Framer is the better fit.
How can I use online communities to improve my skills in Webflow or Framer?
Online communities are an excellent way to dive deeper into Webflow or Framer. By joining spaces like forums, social media groups, or design-centric platforms, you can connect with seasoned users and fellow learners to swap tips, solve problems, and find creative inspiration.
Get involved by joining discussions, asking questions, or showcasing your projects to gather feedback. Many of these communities also offer tutorials, webinars, and challenges that can help you build your skills while keeping you motivated. Being part of these groups not only speeds up your learning process but also keeps you informed about the newest features and techniques for Webflow and Framer.
How can I troubleshoot performance issues in my Webflow or Framer projects?
To address performance issues in your Webflow or Framer projects, start by pinpointing elements that could be slowing things down. Start with images - compress them to minimize load times and ensure you're using the right file formats, like JPEG or PNG for static images and SVG for scalable graphics.
For animations, keep things simple. Limit the number of interactions happening at the same time and avoid overly intricate sequences that could bog down performance.
Next, take a closer look at your project settings. In Webflow, remove unused styles and unnecessary elements to avoid bloating your design. In Framer, focus on keeping components well-organized and avoid too much nesting, which can make your project harder to process.
Make it a habit to preview your project frequently. This lets you test its performance and tweak any problem areas before they become bigger issues. Clean, streamlined designs not only run better but also create a smoother experience for your users.
Related posts
The Ultimate Guide to Product Design for Startups
How to Use Webflow for Faster Design Processes
Webflow vs Framer: Ease of Use for Startups
Design
May 9, 2025
Master the Basics: Get familiar with tools like the Navigator Panel, Design Tools, and Canvas Area.
Use Official Resources: Start with Webflow University and Framer Learn for step-by-step tutorials.
Build Small Projects: Practice by creating simple websites like landing pages or contact forms.
Join Online Communities: Connect with Webflow and Framer forums to get advice, feedback, and inspiration.
Increase Complexity Gradually: Start with static layouts and slowly add animations, interactions, and responsive designs.
Learn Design Methods: Focus on responsive design, accessibility, and performance optimization.
Practice Troubleshooting: Use built-in testing tools to find and fix issues like layout bugs or slow load times.
Quick Comparison: Webflow vs. Framer
Feature | Webflow | Framer |
|---|---|---|
Learning Resources | Webflow University (100+ hours) | Framer Learn (interactive guides) |
Design Focus | Visual coding + responsive design | Prototyping + animations |
Best For | Polished websites | Interactive experiences |
Community | ||
Performance Tools | Audit panel | Debug mode for animations |
Pro Tip: Start small, practice consistently, and use community feedback to improve. Whether you’re a beginner or leveling up, these platforms can help you create professional-quality websites and apps.
Learn Framer For Beginners: Mini Course (2024)
1. Learn the Basic Tools and Layout
Getting comfortable with the basic tools and layout is the first step to creating an efficient design workflow. By understanding how the key features work together, you'll set yourself up for success in your design projects.
Key Areas to Know
Navigator Panel: Found on the left side, this is your go-to for organizing your workspace. It keeps all your elements neatly arranged for quick access.
Design Tools: Located on the right sidebar, these controls let you handle style settings, animations, breakpoints for responsive design, and even preview your work.
Canvas Area: This is the heart of your workspace. Here, you can:
Zoom, pan, and align elements with precision
Switch between desktop and mobile views
Preview interactions as you build them
Tips to Build Confidence with the Tools
Learn and use keyboard shortcuts - they’ll save you tons of time.
Keep your layers and components organized from the start to avoid confusion later.
Save your work often and use version control to track changes.
Spend time experimenting on a blank canvas. It’s a great way to build muscle memory and get a deeper understanding of the tools.
2. Use Official Training Materials
If you're serious about mastering Webflow or Framer, their official training materials should be your go-to resource.
Official Learning Paths
Both platforms provide structured courses to help you level up:
Webflow University: This free platform offers over 100 hours of video tutorials. You'll find everything from basic navigation to advanced animations and interactions.
Framer Learn: An interactive hub packed with tutorials, video guides, and hands-on exercises.
Once you’ve absorbed the lessons, put your knowledge to work through practice.
Getting the Most Out of Official Resources
Start with the foundational courses. These will guide you through essential skills like navigating the interface, creating components, responsive design, and animation basics. Stick to the recommended sequence to ensure you don’t miss any critical steps.
Add-On Learning Tools
While official resources are your main focus, you can deepen your understanding with these extras:
Documentation: The official docs are perfect for quick lookups and clarifications.
Templates: Study official templates to see how experts structure projects.
Community Projects: Browse showcase galleries to get inspired by real-world examples.
These supplementary tools help connect the dots between theory and hands-on application.
Practice Makes Perfect
Don’t just watch or read - practice! Complete every exercise to solidify your skills.
Pro Tip: Set up a dedicated practice project where you can freely experiment with the techniques you’re learning. It’s a safe space to try things out without the fear of messing up a live project.
3. Build Simple Test Projects
Once you've got the basics down, it's time to put your skills to work with small, manageable projects. These exercises will not only boost your confidence but also help you get a deeper understanding of key features in tools like Webflow or Framer.
Start with Straightforward Projects
Kick things off with simple ideas like a personal landing page, a product showcase, or a basic contact form. These types of projects are great for mastering core functionalities without feeling overwhelmed.
Set Realistic Deadlines
Sometimes, all it takes is focused effort to create something impressive in a short time. Offlens Studio has demonstrated this by completing a landing page project in less than 24 hours.
Louis (@louiss) shared his experience:
"I worked with them to launch my landing page. They said they could do the job in under 24 hours and that is exactly what they did. Super happy about the result, it's exactly what I wanted and described to them. 10/10 Would absolutely recommend them to build and launch landing pages."
Simplify Complex Features
When tackling more advanced features, break them into smaller, manageable steps:
Start with Structure: Build the basic layout to establish the framework.
Add Styling: Focus on typography, colors, and overall design aesthetics.
Implement Interactions: Introduce simple animations or hover effects.
Test Responsiveness: Make sure everything looks and works well on mobile devices.
Prioritize Quality Over Speed
While quick turnarounds can be impressive, taking the time to fully understand each feature will lead to better results in the long run.
Perrin (@perrrrrrin) praised a similar approach:
"They were absolutely amazing for the Figma and Framer work. They understood the task in one sentence, and got the job done in 12 hours!! I was expecting a few days but they really went above and beyond with speed and quality. Highly recommend them."
Stay Organized
Good organization is key to a smooth workflow. Use clear folder structures and consistently name your components. As you go, document what you learn and thoroughly test your work before moving on to the next step.
Once you’ve nailed a few basic projects, you can start pushing yourself with more complex challenges. Each step will bring you closer to mastering these tools.
4. Join Online Design Groups
Once you've got a handle on the tools and have started building projects, connecting with other designers can take your skills to the next level. Joining online design communities is a great way to sharpen your Webflow or Framer expertise while learning from others.
Where to Find Support
Online communities like the Webflow Forum and Framer Community are treasure troves of advice and inspiration. Here's what you can gain by being part of these groups:
Get help with technical questions
Share your work and receive constructive feedback
Learn best practices from experienced designers
Explore new techniques and platform features
Build connections with like-minded creatives
These spaces are perfect for solving problems quickly and learning actively through collaboration.
Making the Most of Community Resources
Dive in by introducing yourself and sharing your learning goals. This not only helps others understand how they can assist you but also lays the foundation for meaningful interactions. Posting your progress - complete with before-and-after examples or challenges you've tackled - can solidify your learning and inspire others.
Stay in the Loop with Platform Updates
One of the biggest perks of being part of these groups? Staying informed about platform updates and trends. Community discussions often highlight:
New feature rollouts and how to use them
Workflow changes caused by updates
Practical solutions for common issues
Insights into emerging design trends
By keeping up with these conversations, you can adapt quickly and stay ahead of the curve.
How to Engage Effectively
To get the most out of these communities, focus on meaningful participation. Here are some tips:
Clearly explain your goals or the challenges you're facing
Include screenshots or links to provide context
Follow up on threads with updates or solutions you’ve discovered
Share your knowledge as you grow to help others
Even after you've mastered the basics, these communities can remain an invaluable resource. Regularly engaging with them ensures your skills stay sharp and keeps you connected to the latest in design and platform advancements.
5. Increase Project Difficulty Slowly
The best way to grow your skills is by taking it step by step. Start with the basics and work your way up to more challenging tasks. This approach helps you build confidence while avoiding burnout.
Start with Simple Layouts
Begin by designing clean, static layouts. Focus on organizing elements, perfecting spacing, and ensuring responsiveness. This will give you a solid grasp of layout structure and typography, which are essential building blocks for any project.
Add Complexity Gradually
Once you’re comfortable with basic layouts, challenge yourself by recreating existing websites or templates. Slowly introduce interactive features like hover effects and smooth transitions. This steady progression allows you to expand your abilities without feeling overwhelmed.
Practice to Build Confidence
Every project you complete strengthens your foundation and boosts your confidence. By starting small and gradually increasing the complexity, you’ll develop the practical skills needed to tackle advanced projects with ease.
6. Study Common Design Methods
Getting a handle on design fundamentals in tools like Webflow and Framer can make your learning curve much smoother. Start by focusing on these three key areas:
Responsive Design Fundamentals
Responsive design is all about creating layouts that adapt seamlessly across devices. Here's how you can structure your layouts effectively:
Desktop (992px and up): Stick to a 12-column grid system for clean, organized layouts.
Tablet (768–991px): Simplify the design with a 2-column layout for better usability.
Mobile (below 768px): Shift to a single-column stack to ensure everything fits neatly on smaller screens.
Both Webflow and Framer offer tools to handle these transitions, with Webflow using predefined breakpoints and Framer allowing custom ones. These practices also align with accessibility and performance goals.
Accessibility Best Practices
Good design is inclusive. Focus on these accessibility elements to ensure your designs work for everyone:
Accessibility Feature | How to Implement |
|---|---|
Color Contrast | Maintain a minimum 4.5:1 contrast ratio for text and backgrounds. |
Text Readability | Use a 16px base font and scale down slightly (to 14px) for mobile devices. |
Navigation | Make sure keyboard focus states are clear and functional. |
Accessibility isn’t just ethical - it also improves user experience for everyone. And when paired with performance optimization, it creates a seamless experience.
Performance Optimization
Fast-loading pages are non-negotiable. Here's how you can optimize performance:
Image Optimization
Compress images and size them appropriately. This simple step can reduce page weight by as much as 1MB.
Layout Efficiency
Speed matters. Research shows pages that load in 2 seconds experience a 9% bounce rate, compared to 38% for pages taking 5 seconds. In fact, half of users value speed over flashy animations.Mobile-First Approach
Start designing for the smallest screen first (320px Mobile Portrait breakpoint) and scale up. Mobile devices often take up to 70.9% longer to load pages compared to desktops, so efficient design is critical.
7. Practice Finding and Fixing Issues
Now that you've honed your design and performance optimization skills, it's time to focus on troubleshooting. Tackling problems effectively in Webflow and Framer means practicing with real-world scenarios. Here’s how you can sharpen your ability to spot and resolve design hiccups.
Built-in Testing Tools
Both Webflow and Framer come equipped with tools to help you debug like a pro. Webflow’s Audit panel automatically checks accessibility and ensures contrast ratios meet standards. On the other hand, Framer Motion has a debug mode that lets you visualize animation paths. To activate it, simply use this code snippet:
These tools are your first line of defense when it comes to performance testing.
Performance Optimization Workflow
Did you know that even a slight delay in load times can hurt conversion rates? Monitoring the right metrics can make all the difference. Here are the key areas to focus on:
Testing Phase | Key Metrics | Target Values |
|---|---|---|
Initial Load | First Contentful Paint | < 1.5 seconds |
Interaction | Time to Interactive | < 3.0 seconds |
Layout Stability | Cumulative Layout Shift | < 0.1 |
Make these metrics a regular part of your testing process to ensure your site performs at its best.
Real-World Success Stories
Case studies show that faster load times can drastically reduce bounce rates, proving how crucial performance optimization is for user retention.
Common Issues and Solutions
Here are some frequent problems and how to address them:
Image Optimization
Use native compression to significantly reduce file sizes.
Implement lazy loading for images that don’t need to load immediately.
Layout Consistency
Mobile (320px): Look for stacking issues in smaller screens.
Tablet (768px): Ensure smooth menu transitions.
Desktop (992px+): Double-check grid alignment.
Animation Performance
Aim for a framerate of 60fps for fluid transitions.
Use Framer Motion’s debug mode to pinpoint areas causing slowdowns.
Simplify animations that dip below 30fps.
Monthly Maintenance Checklist
Keep your projects running smoothly with a monthly testing routine:
Run Lighthouse audits to spot performance bottlenecks.
Monitor Core Web Vitals using built-in reporting tools.
Test responsive layouts on various devices.
Validate form submissions and interactive elements.
Why is this important? A whopping 82% of consumers say slow page speeds impact their buying decisions. By adopting these practices early, you’ll build the skills needed to create websites and apps that perform seamlessly.
For more advanced tips on debugging and optimization, check out the Webflow and Framer templates available at Offlens Studio. They’re a great resource to take your skills to the next level.
Conclusion
Becoming proficient in Webflow or Framer doesn’t happen overnight, but with consistent practice and the right approach, you can speed up your progress. The tips shared earlier, combined with hands-on experience, will help you move from beginner to expert more effectively.
Your journey can be broken down into clear stages, each building on the last. Here’s how your growth might look:
Learning Phase | Focus Area | Expected Outcome |
|---|---|---|
Foundation | Basic tools and layouts | Confidently navigating the platform |
Development | Official training and simple projects | Building functional components |
Advanced | Community engagement and complex features | Designing professional-level projects |
Mastery | Troubleshooting and optimization | Delivering polished, high-performing results |
The key to real progress is getting your hands dirty - experimenting, testing, and iterating. Along the way, professional resources can help bridge the gap between learning and execution. For example, Offlens Studio offers templates and guidance tailored for tools like Figma, Framer, and Webflow. These resources can help you turn your knowledge into professional-quality projects.
FAQs
What are the key differences between Webflow and Framer, and when should you use each?
Webflow and Framer are both excellent tools, but they cater to different needs depending on the type of project you're working on.
Webflow is perfect for building fully functional, responsive websites with plenty of customization options. It’s a go-to for designers who want to bring their ideas to life as production-ready websites - no extensive coding required. Plus, it offers seamless hosting integration, making it a solid choice for end-to-end website creation.
Framer, meanwhile, excels at creating interactive and visually rich prototypes or landing pages. It’s ideal for projects that need animations, micro-interactions, or user experience testing before diving into full-scale development.
So, how do you decide? If you’re aiming for a complete, polished website, Webflow is your tool. But if you’re focused on crafting dynamic prototypes or smaller, design-heavy projects, Framer is the better fit.
How can I use online communities to improve my skills in Webflow or Framer?
Online communities are an excellent way to dive deeper into Webflow or Framer. By joining spaces like forums, social media groups, or design-centric platforms, you can connect with seasoned users and fellow learners to swap tips, solve problems, and find creative inspiration.
Get involved by joining discussions, asking questions, or showcasing your projects to gather feedback. Many of these communities also offer tutorials, webinars, and challenges that can help you build your skills while keeping you motivated. Being part of these groups not only speeds up your learning process but also keeps you informed about the newest features and techniques for Webflow and Framer.
How can I troubleshoot performance issues in my Webflow or Framer projects?
To address performance issues in your Webflow or Framer projects, start by pinpointing elements that could be slowing things down. Start with images - compress them to minimize load times and ensure you're using the right file formats, like JPEG or PNG for static images and SVG for scalable graphics.
For animations, keep things simple. Limit the number of interactions happening at the same time and avoid overly intricate sequences that could bog down performance.
Next, take a closer look at your project settings. In Webflow, remove unused styles and unnecessary elements to avoid bloating your design. In Framer, focus on keeping components well-organized and avoid too much nesting, which can make your project harder to process.
Make it a habit to preview your project frequently. This lets you test its performance and tweak any problem areas before they become bigger issues. Clean, streamlined designs not only run better but also create a smoother experience for your users.
Related posts
The Ultimate Guide to Product Design for Startups
How to Use Webflow for Faster Design Processes
Webflow vs Framer: Ease of Use for Startups
Design
May 8, 2025
Master the Basics: Get familiar with tools like the Navigator Panel, Design Tools, and Canvas Area.
Use Official Resources: Start with Webflow University and Framer Learn for step-by-step tutorials.
Build Small Projects: Practice by creating simple websites like landing pages or contact forms.
Join Online Communities: Connect with Webflow and Framer forums to get advice, feedback, and inspiration.
Increase Complexity Gradually: Start with static layouts and slowly add animations, interactions, and responsive designs.
Learn Design Methods: Focus on responsive design, accessibility, and performance optimization.
Practice Troubleshooting: Use built-in testing tools to find and fix issues like layout bugs or slow load times.
Quick Comparison: Webflow vs. Framer
Feature | Webflow | Framer |
|---|---|---|
Learning Resources | Webflow University (100+ hours) | Framer Learn (interactive guides) |
Design Focus | Visual coding + responsive design | Prototyping + animations |
Best For | Polished websites | Interactive experiences |
Community | ||
Performance Tools | Audit panel | Debug mode for animations |
Pro Tip: Start small, practice consistently, and use community feedback to improve. Whether you’re a beginner or leveling up, these platforms can help you create professional-quality websites and apps.
Learn Framer For Beginners: Mini Course (2024)
1. Learn the Basic Tools and Layout
Getting comfortable with the basic tools and layout is the first step to creating an efficient design workflow. By understanding how the key features work together, you'll set yourself up for success in your design projects.
Key Areas to Know
Navigator Panel: Found on the left side, this is your go-to for organizing your workspace. It keeps all your elements neatly arranged for quick access.
Design Tools: Located on the right sidebar, these controls let you handle style settings, animations, breakpoints for responsive design, and even preview your work.
Canvas Area: This is the heart of your workspace. Here, you can:
Zoom, pan, and align elements with precision
Switch between desktop and mobile views
Preview interactions as you build them
Tips to Build Confidence with the Tools
Learn and use keyboard shortcuts - they’ll save you tons of time.
Keep your layers and components organized from the start to avoid confusion later.
Save your work often and use version control to track changes.
Spend time experimenting on a blank canvas. It’s a great way to build muscle memory and get a deeper understanding of the tools.
2. Use Official Training Materials
If you're serious about mastering Webflow or Framer, their official training materials should be your go-to resource.
Official Learning Paths
Both platforms provide structured courses to help you level up:
Webflow University: This free platform offers over 100 hours of video tutorials. You'll find everything from basic navigation to advanced animations and interactions.
Framer Learn: An interactive hub packed with tutorials, video guides, and hands-on exercises.
Once you’ve absorbed the lessons, put your knowledge to work through practice.
Getting the Most Out of Official Resources
Start with the foundational courses. These will guide you through essential skills like navigating the interface, creating components, responsive design, and animation basics. Stick to the recommended sequence to ensure you don’t miss any critical steps.
Add-On Learning Tools
While official resources are your main focus, you can deepen your understanding with these extras:
Documentation: The official docs are perfect for quick lookups and clarifications.
Templates: Study official templates to see how experts structure projects.
Community Projects: Browse showcase galleries to get inspired by real-world examples.
These supplementary tools help connect the dots between theory and hands-on application.
Practice Makes Perfect
Don’t just watch or read - practice! Complete every exercise to solidify your skills.
Pro Tip: Set up a dedicated practice project where you can freely experiment with the techniques you’re learning. It’s a safe space to try things out without the fear of messing up a live project.
3. Build Simple Test Projects
Once you've got the basics down, it's time to put your skills to work with small, manageable projects. These exercises will not only boost your confidence but also help you get a deeper understanding of key features in tools like Webflow or Framer.
Start with Straightforward Projects
Kick things off with simple ideas like a personal landing page, a product showcase, or a basic contact form. These types of projects are great for mastering core functionalities without feeling overwhelmed.
Set Realistic Deadlines
Sometimes, all it takes is focused effort to create something impressive in a short time. Offlens Studio has demonstrated this by completing a landing page project in less than 24 hours.
Louis (@louiss) shared his experience:
"I worked with them to launch my landing page. They said they could do the job in under 24 hours and that is exactly what they did. Super happy about the result, it's exactly what I wanted and described to them. 10/10 Would absolutely recommend them to build and launch landing pages."
Simplify Complex Features
When tackling more advanced features, break them into smaller, manageable steps:
Start with Structure: Build the basic layout to establish the framework.
Add Styling: Focus on typography, colors, and overall design aesthetics.
Implement Interactions: Introduce simple animations or hover effects.
Test Responsiveness: Make sure everything looks and works well on mobile devices.
Prioritize Quality Over Speed
While quick turnarounds can be impressive, taking the time to fully understand each feature will lead to better results in the long run.
Perrin (@perrrrrrin) praised a similar approach:
"They were absolutely amazing for the Figma and Framer work. They understood the task in one sentence, and got the job done in 12 hours!! I was expecting a few days but they really went above and beyond with speed and quality. Highly recommend them."
Stay Organized
Good organization is key to a smooth workflow. Use clear folder structures and consistently name your components. As you go, document what you learn and thoroughly test your work before moving on to the next step.
Once you’ve nailed a few basic projects, you can start pushing yourself with more complex challenges. Each step will bring you closer to mastering these tools.
4. Join Online Design Groups
Once you've got a handle on the tools and have started building projects, connecting with other designers can take your skills to the next level. Joining online design communities is a great way to sharpen your Webflow or Framer expertise while learning from others.
Where to Find Support
Online communities like the Webflow Forum and Framer Community are treasure troves of advice and inspiration. Here's what you can gain by being part of these groups:
Get help with technical questions
Share your work and receive constructive feedback
Learn best practices from experienced designers
Explore new techniques and platform features
Build connections with like-minded creatives
These spaces are perfect for solving problems quickly and learning actively through collaboration.
Making the Most of Community Resources
Dive in by introducing yourself and sharing your learning goals. This not only helps others understand how they can assist you but also lays the foundation for meaningful interactions. Posting your progress - complete with before-and-after examples or challenges you've tackled - can solidify your learning and inspire others.
Stay in the Loop with Platform Updates
One of the biggest perks of being part of these groups? Staying informed about platform updates and trends. Community discussions often highlight:
New feature rollouts and how to use them
Workflow changes caused by updates
Practical solutions for common issues
Insights into emerging design trends
By keeping up with these conversations, you can adapt quickly and stay ahead of the curve.
How to Engage Effectively
To get the most out of these communities, focus on meaningful participation. Here are some tips:
Clearly explain your goals or the challenges you're facing
Include screenshots or links to provide context
Follow up on threads with updates or solutions you’ve discovered
Share your knowledge as you grow to help others
Even after you've mastered the basics, these communities can remain an invaluable resource. Regularly engaging with them ensures your skills stay sharp and keeps you connected to the latest in design and platform advancements.
5. Increase Project Difficulty Slowly
The best way to grow your skills is by taking it step by step. Start with the basics and work your way up to more challenging tasks. This approach helps you build confidence while avoiding burnout.
Start with Simple Layouts
Begin by designing clean, static layouts. Focus on organizing elements, perfecting spacing, and ensuring responsiveness. This will give you a solid grasp of layout structure and typography, which are essential building blocks for any project.
Add Complexity Gradually
Once you’re comfortable with basic layouts, challenge yourself by recreating existing websites or templates. Slowly introduce interactive features like hover effects and smooth transitions. This steady progression allows you to expand your abilities without feeling overwhelmed.
Practice to Build Confidence
Every project you complete strengthens your foundation and boosts your confidence. By starting small and gradually increasing the complexity, you’ll develop the practical skills needed to tackle advanced projects with ease.
6. Study Common Design Methods
Getting a handle on design fundamentals in tools like Webflow and Framer can make your learning curve much smoother. Start by focusing on these three key areas:
Responsive Design Fundamentals
Responsive design is all about creating layouts that adapt seamlessly across devices. Here's how you can structure your layouts effectively:
Desktop (992px and up): Stick to a 12-column grid system for clean, organized layouts.
Tablet (768–991px): Simplify the design with a 2-column layout for better usability.
Mobile (below 768px): Shift to a single-column stack to ensure everything fits neatly on smaller screens.
Both Webflow and Framer offer tools to handle these transitions, with Webflow using predefined breakpoints and Framer allowing custom ones. These practices also align with accessibility and performance goals.
Accessibility Best Practices
Good design is inclusive. Focus on these accessibility elements to ensure your designs work for everyone:
Accessibility Feature | How to Implement |
|---|---|
Color Contrast | Maintain a minimum 4.5:1 contrast ratio for text and backgrounds. |
Text Readability | Use a 16px base font and scale down slightly (to 14px) for mobile devices. |
Navigation | Make sure keyboard focus states are clear and functional. |
Accessibility isn’t just ethical - it also improves user experience for everyone. And when paired with performance optimization, it creates a seamless experience.
Performance Optimization
Fast-loading pages are non-negotiable. Here's how you can optimize performance:
Image Optimization
Compress images and size them appropriately. This simple step can reduce page weight by as much as 1MB.
Layout Efficiency
Speed matters. Research shows pages that load in 2 seconds experience a 9% bounce rate, compared to 38% for pages taking 5 seconds. In fact, half of users value speed over flashy animations.Mobile-First Approach
Start designing for the smallest screen first (320px Mobile Portrait breakpoint) and scale up. Mobile devices often take up to 70.9% longer to load pages compared to desktops, so efficient design is critical.
7. Practice Finding and Fixing Issues
Now that you've honed your design and performance optimization skills, it's time to focus on troubleshooting. Tackling problems effectively in Webflow and Framer means practicing with real-world scenarios. Here’s how you can sharpen your ability to spot and resolve design hiccups.
Built-in Testing Tools
Both Webflow and Framer come equipped with tools to help you debug like a pro. Webflow’s Audit panel automatically checks accessibility and ensures contrast ratios meet standards. On the other hand, Framer Motion has a debug mode that lets you visualize animation paths. To activate it, simply use this code snippet:
These tools are your first line of defense when it comes to performance testing.
Performance Optimization Workflow
Did you know that even a slight delay in load times can hurt conversion rates? Monitoring the right metrics can make all the difference. Here are the key areas to focus on:
Testing Phase | Key Metrics | Target Values |
|---|---|---|
Initial Load | First Contentful Paint | < 1.5 seconds |
Interaction | Time to Interactive | < 3.0 seconds |
Layout Stability | Cumulative Layout Shift | < 0.1 |
Make these metrics a regular part of your testing process to ensure your site performs at its best.
Real-World Success Stories
Case studies show that faster load times can drastically reduce bounce rates, proving how crucial performance optimization is for user retention.
Common Issues and Solutions
Here are some frequent problems and how to address them:
Image Optimization
Use native compression to significantly reduce file sizes.
Implement lazy loading for images that don’t need to load immediately.
Layout Consistency
Mobile (320px): Look for stacking issues in smaller screens.
Tablet (768px): Ensure smooth menu transitions.
Desktop (992px+): Double-check grid alignment.
Animation Performance
Aim for a framerate of 60fps for fluid transitions.
Use Framer Motion’s debug mode to pinpoint areas causing slowdowns.
Simplify animations that dip below 30fps.
Monthly Maintenance Checklist
Keep your projects running smoothly with a monthly testing routine:
Run Lighthouse audits to spot performance bottlenecks.
Monitor Core Web Vitals using built-in reporting tools.
Test responsive layouts on various devices.
Validate form submissions and interactive elements.
Why is this important? A whopping 82% of consumers say slow page speeds impact their buying decisions. By adopting these practices early, you’ll build the skills needed to create websites and apps that perform seamlessly.
For more advanced tips on debugging and optimization, check out the Webflow and Framer templates available at Offlens Studio. They’re a great resource to take your skills to the next level.
Conclusion
Becoming proficient in Webflow or Framer doesn’t happen overnight, but with consistent practice and the right approach, you can speed up your progress. The tips shared earlier, combined with hands-on experience, will help you move from beginner to expert more effectively.
Your journey can be broken down into clear stages, each building on the last. Here’s how your growth might look:
Learning Phase | Focus Area | Expected Outcome |
|---|---|---|
Foundation | Basic tools and layouts | Confidently navigating the platform |
Development | Official training and simple projects | Building functional components |
Advanced | Community engagement and complex features | Designing professional-level projects |
Mastery | Troubleshooting and optimization | Delivering polished, high-performing results |
The key to real progress is getting your hands dirty - experimenting, testing, and iterating. Along the way, professional resources can help bridge the gap between learning and execution. For example, Offlens Studio offers templates and guidance tailored for tools like Figma, Framer, and Webflow. These resources can help you turn your knowledge into professional-quality projects.
FAQs
What are the key differences between Webflow and Framer, and when should you use each?
Webflow and Framer are both excellent tools, but they cater to different needs depending on the type of project you're working on.
Webflow is perfect for building fully functional, responsive websites with plenty of customization options. It’s a go-to for designers who want to bring their ideas to life as production-ready websites - no extensive coding required. Plus, it offers seamless hosting integration, making it a solid choice for end-to-end website creation.
Framer, meanwhile, excels at creating interactive and visually rich prototypes or landing pages. It’s ideal for projects that need animations, micro-interactions, or user experience testing before diving into full-scale development.
So, how do you decide? If you’re aiming for a complete, polished website, Webflow is your tool. But if you’re focused on crafting dynamic prototypes or smaller, design-heavy projects, Framer is the better fit.
How can I use online communities to improve my skills in Webflow or Framer?
Online communities are an excellent way to dive deeper into Webflow or Framer. By joining spaces like forums, social media groups, or design-centric platforms, you can connect with seasoned users and fellow learners to swap tips, solve problems, and find creative inspiration.
Get involved by joining discussions, asking questions, or showcasing your projects to gather feedback. Many of these communities also offer tutorials, webinars, and challenges that can help you build your skills while keeping you motivated. Being part of these groups not only speeds up your learning process but also keeps you informed about the newest features and techniques for Webflow and Framer.
How can I troubleshoot performance issues in my Webflow or Framer projects?
To address performance issues in your Webflow or Framer projects, start by pinpointing elements that could be slowing things down. Start with images - compress them to minimize load times and ensure you're using the right file formats, like JPEG or PNG for static images and SVG for scalable graphics.
For animations, keep things simple. Limit the number of interactions happening at the same time and avoid overly intricate sequences that could bog down performance.
Next, take a closer look at your project settings. In Webflow, remove unused styles and unnecessary elements to avoid bloating your design. In Framer, focus on keeping components well-organized and avoid too much nesting, which can make your project harder to process.
Make it a habit to preview your project frequently. This lets you test its performance and tweak any problem areas before they become bigger issues. Clean, streamlined designs not only run better but also create a smoother experience for your users.
Related posts
The Ultimate Guide to Product Design for Startups
How to Use Webflow for Faster Design Processes
Webflow vs Framer: Ease of Use for Startups
Design
May 6, 2025
Master the Basics: Get familiar with tools like the Navigator Panel, Design Tools, and Canvas Area.
Use Official Resources: Start with Webflow University and Framer Learn for step-by-step tutorials.
Build Small Projects: Practice by creating simple websites like landing pages or contact forms.
Join Online Communities: Connect with Webflow and Framer forums to get advice, feedback, and inspiration.
Increase Complexity Gradually: Start with static layouts and slowly add animations, interactions, and responsive designs.
Learn Design Methods: Focus on responsive design, accessibility, and performance optimization.
Practice Troubleshooting: Use built-in testing tools to find and fix issues like layout bugs or slow load times.
Quick Comparison: Webflow vs. Framer
Feature | Webflow | Framer |
|---|---|---|
Learning Resources | Webflow University (100+ hours) | Framer Learn (interactive guides) |
Design Focus | Visual coding + responsive design | Prototyping + animations |
Best For | Polished websites | Interactive experiences |
Community | ||
Performance Tools | Audit panel | Debug mode for animations |
Pro Tip: Start small, practice consistently, and use community feedback to improve. Whether you’re a beginner or leveling up, these platforms can help you create professional-quality websites and apps.
Learn Framer For Beginners: Mini Course (2024)
1. Learn the Basic Tools and Layout
Getting comfortable with the basic tools and layout is the first step to creating an efficient design workflow. By understanding how the key features work together, you'll set yourself up for success in your design projects.
Key Areas to Know
Navigator Panel: Found on the left side, this is your go-to for organizing your workspace. It keeps all your elements neatly arranged for quick access.
Design Tools: Located on the right sidebar, these controls let you handle style settings, animations, breakpoints for responsive design, and even preview your work.
Canvas Area: This is the heart of your workspace. Here, you can:
Zoom, pan, and align elements with precision
Switch between desktop and mobile views
Preview interactions as you build them
Tips to Build Confidence with the Tools
Learn and use keyboard shortcuts - they’ll save you tons of time.
Keep your layers and components organized from the start to avoid confusion later.
Save your work often and use version control to track changes.
Spend time experimenting on a blank canvas. It’s a great way to build muscle memory and get a deeper understanding of the tools.
2. Use Official Training Materials
If you're serious about mastering Webflow or Framer, their official training materials should be your go-to resource.
Official Learning Paths
Both platforms provide structured courses to help you level up:
Webflow University: This free platform offers over 100 hours of video tutorials. You'll find everything from basic navigation to advanced animations and interactions.
Framer Learn: An interactive hub packed with tutorials, video guides, and hands-on exercises.
Once you’ve absorbed the lessons, put your knowledge to work through practice.
Getting the Most Out of Official Resources
Start with the foundational courses. These will guide you through essential skills like navigating the interface, creating components, responsive design, and animation basics. Stick to the recommended sequence to ensure you don’t miss any critical steps.
Add-On Learning Tools
While official resources are your main focus, you can deepen your understanding with these extras:
Documentation: The official docs are perfect for quick lookups and clarifications.
Templates: Study official templates to see how experts structure projects.
Community Projects: Browse showcase galleries to get inspired by real-world examples.
These supplementary tools help connect the dots between theory and hands-on application.
Practice Makes Perfect
Don’t just watch or read - practice! Complete every exercise to solidify your skills.
Pro Tip: Set up a dedicated practice project where you can freely experiment with the techniques you’re learning. It’s a safe space to try things out without the fear of messing up a live project.
3. Build Simple Test Projects
Once you've got the basics down, it's time to put your skills to work with small, manageable projects. These exercises will not only boost your confidence but also help you get a deeper understanding of key features in tools like Webflow or Framer.
Start with Straightforward Projects
Kick things off with simple ideas like a personal landing page, a product showcase, or a basic contact form. These types of projects are great for mastering core functionalities without feeling overwhelmed.
Set Realistic Deadlines
Sometimes, all it takes is focused effort to create something impressive in a short time. Offlens Studio has demonstrated this by completing a landing page project in less than 24 hours.
Louis (@louiss) shared his experience:
"I worked with them to launch my landing page. They said they could do the job in under 24 hours and that is exactly what they did. Super happy about the result, it's exactly what I wanted and described to them. 10/10 Would absolutely recommend them to build and launch landing pages."
Simplify Complex Features
When tackling more advanced features, break them into smaller, manageable steps:
Start with Structure: Build the basic layout to establish the framework.
Add Styling: Focus on typography, colors, and overall design aesthetics.
Implement Interactions: Introduce simple animations or hover effects.
Test Responsiveness: Make sure everything looks and works well on mobile devices.
Prioritize Quality Over Speed
While quick turnarounds can be impressive, taking the time to fully understand each feature will lead to better results in the long run.
Perrin (@perrrrrrin) praised a similar approach:
"They were absolutely amazing for the Figma and Framer work. They understood the task in one sentence, and got the job done in 12 hours!! I was expecting a few days but they really went above and beyond with speed and quality. Highly recommend them."
Stay Organized
Good organization is key to a smooth workflow. Use clear folder structures and consistently name your components. As you go, document what you learn and thoroughly test your work before moving on to the next step.
Once you’ve nailed a few basic projects, you can start pushing yourself with more complex challenges. Each step will bring you closer to mastering these tools.
4. Join Online Design Groups
Once you've got a handle on the tools and have started building projects, connecting with other designers can take your skills to the next level. Joining online design communities is a great way to sharpen your Webflow or Framer expertise while learning from others.
Where to Find Support
Online communities like the Webflow Forum and Framer Community are treasure troves of advice and inspiration. Here's what you can gain by being part of these groups:
Get help with technical questions
Share your work and receive constructive feedback
Learn best practices from experienced designers
Explore new techniques and platform features
Build connections with like-minded creatives
These spaces are perfect for solving problems quickly and learning actively through collaboration.
Making the Most of Community Resources
Dive in by introducing yourself and sharing your learning goals. This not only helps others understand how they can assist you but also lays the foundation for meaningful interactions. Posting your progress - complete with before-and-after examples or challenges you've tackled - can solidify your learning and inspire others.
Stay in the Loop with Platform Updates
One of the biggest perks of being part of these groups? Staying informed about platform updates and trends. Community discussions often highlight:
New feature rollouts and how to use them
Workflow changes caused by updates
Practical solutions for common issues
Insights into emerging design trends
By keeping up with these conversations, you can adapt quickly and stay ahead of the curve.
How to Engage Effectively
To get the most out of these communities, focus on meaningful participation. Here are some tips:
Clearly explain your goals or the challenges you're facing
Include screenshots or links to provide context
Follow up on threads with updates or solutions you’ve discovered
Share your knowledge as you grow to help others
Even after you've mastered the basics, these communities can remain an invaluable resource. Regularly engaging with them ensures your skills stay sharp and keeps you connected to the latest in design and platform advancements.
5. Increase Project Difficulty Slowly
The best way to grow your skills is by taking it step by step. Start with the basics and work your way up to more challenging tasks. This approach helps you build confidence while avoiding burnout.
Start with Simple Layouts
Begin by designing clean, static layouts. Focus on organizing elements, perfecting spacing, and ensuring responsiveness. This will give you a solid grasp of layout structure and typography, which are essential building blocks for any project.
Add Complexity Gradually
Once you’re comfortable with basic layouts, challenge yourself by recreating existing websites or templates. Slowly introduce interactive features like hover effects and smooth transitions. This steady progression allows you to expand your abilities without feeling overwhelmed.
Practice to Build Confidence
Every project you complete strengthens your foundation and boosts your confidence. By starting small and gradually increasing the complexity, you’ll develop the practical skills needed to tackle advanced projects with ease.
6. Study Common Design Methods
Getting a handle on design fundamentals in tools like Webflow and Framer can make your learning curve much smoother. Start by focusing on these three key areas:
Responsive Design Fundamentals
Responsive design is all about creating layouts that adapt seamlessly across devices. Here's how you can structure your layouts effectively:
Desktop (992px and up): Stick to a 12-column grid system for clean, organized layouts.
Tablet (768–991px): Simplify the design with a 2-column layout for better usability.
Mobile (below 768px): Shift to a single-column stack to ensure everything fits neatly on smaller screens.
Both Webflow and Framer offer tools to handle these transitions, with Webflow using predefined breakpoints and Framer allowing custom ones. These practices also align with accessibility and performance goals.
Accessibility Best Practices
Good design is inclusive. Focus on these accessibility elements to ensure your designs work for everyone:
Accessibility Feature | How to Implement |
|---|---|
Color Contrast | Maintain a minimum 4.5:1 contrast ratio for text and backgrounds. |
Text Readability | Use a 16px base font and scale down slightly (to 14px) for mobile devices. |
Navigation | Make sure keyboard focus states are clear and functional. |
Accessibility isn’t just ethical - it also improves user experience for everyone. And when paired with performance optimization, it creates a seamless experience.
Performance Optimization
Fast-loading pages are non-negotiable. Here's how you can optimize performance:
Image Optimization
Compress images and size them appropriately. This simple step can reduce page weight by as much as 1MB.
Layout Efficiency
Speed matters. Research shows pages that load in 2 seconds experience a 9% bounce rate, compared to 38% for pages taking 5 seconds. In fact, half of users value speed over flashy animations.Mobile-First Approach
Start designing for the smallest screen first (320px Mobile Portrait breakpoint) and scale up. Mobile devices often take up to 70.9% longer to load pages compared to desktops, so efficient design is critical.
7. Practice Finding and Fixing Issues
Now that you've honed your design and performance optimization skills, it's time to focus on troubleshooting. Tackling problems effectively in Webflow and Framer means practicing with real-world scenarios. Here’s how you can sharpen your ability to spot and resolve design hiccups.
Built-in Testing Tools
Both Webflow and Framer come equipped with tools to help you debug like a pro. Webflow’s Audit panel automatically checks accessibility and ensures contrast ratios meet standards. On the other hand, Framer Motion has a debug mode that lets you visualize animation paths. To activate it, simply use this code snippet:
These tools are your first line of defense when it comes to performance testing.
Performance Optimization Workflow
Did you know that even a slight delay in load times can hurt conversion rates? Monitoring the right metrics can make all the difference. Here are the key areas to focus on:
Testing Phase | Key Metrics | Target Values |
|---|---|---|
Initial Load | First Contentful Paint | < 1.5 seconds |
Interaction | Time to Interactive | < 3.0 seconds |
Layout Stability | Cumulative Layout Shift | < 0.1 |
Make these metrics a regular part of your testing process to ensure your site performs at its best.
Real-World Success Stories
Case studies show that faster load times can drastically reduce bounce rates, proving how crucial performance optimization is for user retention.
Common Issues and Solutions
Here are some frequent problems and how to address them:
Image Optimization
Use native compression to significantly reduce file sizes.
Implement lazy loading for images that don’t need to load immediately.
Layout Consistency
Mobile (320px): Look for stacking issues in smaller screens.
Tablet (768px): Ensure smooth menu transitions.
Desktop (992px+): Double-check grid alignment.
Animation Performance
Aim for a framerate of 60fps for fluid transitions.
Use Framer Motion’s debug mode to pinpoint areas causing slowdowns.
Simplify animations that dip below 30fps.
Monthly Maintenance Checklist
Keep your projects running smoothly with a monthly testing routine:
Run Lighthouse audits to spot performance bottlenecks.
Monitor Core Web Vitals using built-in reporting tools.
Test responsive layouts on various devices.
Validate form submissions and interactive elements.
Why is this important? A whopping 82% of consumers say slow page speeds impact their buying decisions. By adopting these practices early, you’ll build the skills needed to create websites and apps that perform seamlessly.
For more advanced tips on debugging and optimization, check out the Webflow and Framer templates available at Offlens Studio. They’re a great resource to take your skills to the next level.
Conclusion
Becoming proficient in Webflow or Framer doesn’t happen overnight, but with consistent practice and the right approach, you can speed up your progress. The tips shared earlier, combined with hands-on experience, will help you move from beginner to expert more effectively.
Your journey can be broken down into clear stages, each building on the last. Here’s how your growth might look:
Learning Phase | Focus Area | Expected Outcome |
|---|---|---|
Foundation | Basic tools and layouts | Confidently navigating the platform |
Development | Official training and simple projects | Building functional components |
Advanced | Community engagement and complex features | Designing professional-level projects |
Mastery | Troubleshooting and optimization | Delivering polished, high-performing results |
The key to real progress is getting your hands dirty - experimenting, testing, and iterating. Along the way, professional resources can help bridge the gap between learning and execution. For example, Offlens Studio offers templates and guidance tailored for tools like Figma, Framer, and Webflow. These resources can help you turn your knowledge into professional-quality projects.
FAQs
What are the key differences between Webflow and Framer, and when should you use each?
Webflow and Framer are both excellent tools, but they cater to different needs depending on the type of project you're working on.
Webflow is perfect for building fully functional, responsive websites with plenty of customization options. It’s a go-to for designers who want to bring their ideas to life as production-ready websites - no extensive coding required. Plus, it offers seamless hosting integration, making it a solid choice for end-to-end website creation.
Framer, meanwhile, excels at creating interactive and visually rich prototypes or landing pages. It’s ideal for projects that need animations, micro-interactions, or user experience testing before diving into full-scale development.
So, how do you decide? If you’re aiming for a complete, polished website, Webflow is your tool. But if you’re focused on crafting dynamic prototypes or smaller, design-heavy projects, Framer is the better fit.
How can I use online communities to improve my skills in Webflow or Framer?
Online communities are an excellent way to dive deeper into Webflow or Framer. By joining spaces like forums, social media groups, or design-centric platforms, you can connect with seasoned users and fellow learners to swap tips, solve problems, and find creative inspiration.
Get involved by joining discussions, asking questions, or showcasing your projects to gather feedback. Many of these communities also offer tutorials, webinars, and challenges that can help you build your skills while keeping you motivated. Being part of these groups not only speeds up your learning process but also keeps you informed about the newest features and techniques for Webflow and Framer.
How can I troubleshoot performance issues in my Webflow or Framer projects?
To address performance issues in your Webflow or Framer projects, start by pinpointing elements that could be slowing things down. Start with images - compress them to minimize load times and ensure you're using the right file formats, like JPEG or PNG for static images and SVG for scalable graphics.
For animations, keep things simple. Limit the number of interactions happening at the same time and avoid overly intricate sequences that could bog down performance.
Next, take a closer look at your project settings. In Webflow, remove unused styles and unnecessary elements to avoid bloating your design. In Framer, focus on keeping components well-organized and avoid too much nesting, which can make your project harder to process.
Make it a habit to preview your project frequently. This lets you test its performance and tweak any problem areas before they become bigger issues. Clean, streamlined designs not only run better but also create a smoother experience for your users.
Related posts
The Ultimate Guide to Product Design for Startups
How to Use Webflow for Faster Design Processes
Webflow vs Framer: Ease of Use for Startups
Design
May 7, 2025
Master the Basics: Get familiar with tools like the Navigator Panel, Design Tools, and Canvas Area.
Use Official Resources: Start with Webflow University and Framer Learn for step-by-step tutorials.
Build Small Projects: Practice by creating simple websites like landing pages or contact forms.
Join Online Communities: Connect with Webflow and Framer forums to get advice, feedback, and inspiration.
Increase Complexity Gradually: Start with static layouts and slowly add animations, interactions, and responsive designs.
Learn Design Methods: Focus on responsive design, accessibility, and performance optimization.
Practice Troubleshooting: Use built-in testing tools to find and fix issues like layout bugs or slow load times.
Quick Comparison: Webflow vs. Framer
Feature | Webflow | Framer |
|---|---|---|
Learning Resources | Webflow University (100+ hours) | Framer Learn (interactive guides) |
Design Focus | Visual coding + responsive design | Prototyping + animations |
Best For | Polished websites | Interactive experiences |
Community | ||
Performance Tools | Audit panel | Debug mode for animations |
Pro Tip: Start small, practice consistently, and use community feedback to improve. Whether you’re a beginner or leveling up, these platforms can help you create professional-quality websites and apps.
Learn Framer For Beginners: Mini Course (2024)
1. Learn the Basic Tools and Layout
Getting comfortable with the basic tools and layout is the first step to creating an efficient design workflow. By understanding how the key features work together, you'll set yourself up for success in your design projects.
Key Areas to Know
Navigator Panel: Found on the left side, this is your go-to for organizing your workspace. It keeps all your elements neatly arranged for quick access.
Design Tools: Located on the right sidebar, these controls let you handle style settings, animations, breakpoints for responsive design, and even preview your work.
Canvas Area: This is the heart of your workspace. Here, you can:
Zoom, pan, and align elements with precision
Switch between desktop and mobile views
Preview interactions as you build them
Tips to Build Confidence with the Tools
Learn and use keyboard shortcuts - they’ll save you tons of time.
Keep your layers and components organized from the start to avoid confusion later.
Save your work often and use version control to track changes.
Spend time experimenting on a blank canvas. It’s a great way to build muscle memory and get a deeper understanding of the tools.
2. Use Official Training Materials
If you're serious about mastering Webflow or Framer, their official training materials should be your go-to resource.
Official Learning Paths
Both platforms provide structured courses to help you level up:
Webflow University: This free platform offers over 100 hours of video tutorials. You'll find everything from basic navigation to advanced animations and interactions.
Framer Learn: An interactive hub packed with tutorials, video guides, and hands-on exercises.
Once you’ve absorbed the lessons, put your knowledge to work through practice.
Getting the Most Out of Official Resources
Start with the foundational courses. These will guide you through essential skills like navigating the interface, creating components, responsive design, and animation basics. Stick to the recommended sequence to ensure you don’t miss any critical steps.
Add-On Learning Tools
While official resources are your main focus, you can deepen your understanding with these extras:
Documentation: The official docs are perfect for quick lookups and clarifications.
Templates: Study official templates to see how experts structure projects.
Community Projects: Browse showcase galleries to get inspired by real-world examples.
These supplementary tools help connect the dots between theory and hands-on application.
Practice Makes Perfect
Don’t just watch or read - practice! Complete every exercise to solidify your skills.
Pro Tip: Set up a dedicated practice project where you can freely experiment with the techniques you’re learning. It’s a safe space to try things out without the fear of messing up a live project.
3. Build Simple Test Projects
Once you've got the basics down, it's time to put your skills to work with small, manageable projects. These exercises will not only boost your confidence but also help you get a deeper understanding of key features in tools like Webflow or Framer.
Start with Straightforward Projects
Kick things off with simple ideas like a personal landing page, a product showcase, or a basic contact form. These types of projects are great for mastering core functionalities without feeling overwhelmed.
Set Realistic Deadlines
Sometimes, all it takes is focused effort to create something impressive in a short time. Offlens Studio has demonstrated this by completing a landing page project in less than 24 hours.
Louis (@louiss) shared his experience:
"I worked with them to launch my landing page. They said they could do the job in under 24 hours and that is exactly what they did. Super happy about the result, it's exactly what I wanted and described to them. 10/10 Would absolutely recommend them to build and launch landing pages."
Simplify Complex Features
When tackling more advanced features, break them into smaller, manageable steps:
Start with Structure: Build the basic layout to establish the framework.
Add Styling: Focus on typography, colors, and overall design aesthetics.
Implement Interactions: Introduce simple animations or hover effects.
Test Responsiveness: Make sure everything looks and works well on mobile devices.
Prioritize Quality Over Speed
While quick turnarounds can be impressive, taking the time to fully understand each feature will lead to better results in the long run.
Perrin (@perrrrrrin) praised a similar approach:
"They were absolutely amazing for the Figma and Framer work. They understood the task in one sentence, and got the job done in 12 hours!! I was expecting a few days but they really went above and beyond with speed and quality. Highly recommend them."
Stay Organized
Good organization is key to a smooth workflow. Use clear folder structures and consistently name your components. As you go, document what you learn and thoroughly test your work before moving on to the next step.
Once you’ve nailed a few basic projects, you can start pushing yourself with more complex challenges. Each step will bring you closer to mastering these tools.
4. Join Online Design Groups
Once you've got a handle on the tools and have started building projects, connecting with other designers can take your skills to the next level. Joining online design communities is a great way to sharpen your Webflow or Framer expertise while learning from others.
Where to Find Support
Online communities like the Webflow Forum and Framer Community are treasure troves of advice and inspiration. Here's what you can gain by being part of these groups:
Get help with technical questions
Share your work and receive constructive feedback
Learn best practices from experienced designers
Explore new techniques and platform features
Build connections with like-minded creatives
These spaces are perfect for solving problems quickly and learning actively through collaboration.
Making the Most of Community Resources
Dive in by introducing yourself and sharing your learning goals. This not only helps others understand how they can assist you but also lays the foundation for meaningful interactions. Posting your progress - complete with before-and-after examples or challenges you've tackled - can solidify your learning and inspire others.
Stay in the Loop with Platform Updates
One of the biggest perks of being part of these groups? Staying informed about platform updates and trends. Community discussions often highlight:
New feature rollouts and how to use them
Workflow changes caused by updates
Practical solutions for common issues
Insights into emerging design trends
By keeping up with these conversations, you can adapt quickly and stay ahead of the curve.
How to Engage Effectively
To get the most out of these communities, focus on meaningful participation. Here are some tips:
Clearly explain your goals or the challenges you're facing
Include screenshots or links to provide context
Follow up on threads with updates or solutions you’ve discovered
Share your knowledge as you grow to help others
Even after you've mastered the basics, these communities can remain an invaluable resource. Regularly engaging with them ensures your skills stay sharp and keeps you connected to the latest in design and platform advancements.
5. Increase Project Difficulty Slowly
The best way to grow your skills is by taking it step by step. Start with the basics and work your way up to more challenging tasks. This approach helps you build confidence while avoiding burnout.
Start with Simple Layouts
Begin by designing clean, static layouts. Focus on organizing elements, perfecting spacing, and ensuring responsiveness. This will give you a solid grasp of layout structure and typography, which are essential building blocks for any project.
Add Complexity Gradually
Once you’re comfortable with basic layouts, challenge yourself by recreating existing websites or templates. Slowly introduce interactive features like hover effects and smooth transitions. This steady progression allows you to expand your abilities without feeling overwhelmed.
Practice to Build Confidence
Every project you complete strengthens your foundation and boosts your confidence. By starting small and gradually increasing the complexity, you’ll develop the practical skills needed to tackle advanced projects with ease.
6. Study Common Design Methods
Getting a handle on design fundamentals in tools like Webflow and Framer can make your learning curve much smoother. Start by focusing on these three key areas:
Responsive Design Fundamentals
Responsive design is all about creating layouts that adapt seamlessly across devices. Here's how you can structure your layouts effectively:
Desktop (992px and up): Stick to a 12-column grid system for clean, organized layouts.
Tablet (768–991px): Simplify the design with a 2-column layout for better usability.
Mobile (below 768px): Shift to a single-column stack to ensure everything fits neatly on smaller screens.
Both Webflow and Framer offer tools to handle these transitions, with Webflow using predefined breakpoints and Framer allowing custom ones. These practices also align with accessibility and performance goals.
Accessibility Best Practices
Good design is inclusive. Focus on these accessibility elements to ensure your designs work for everyone:
Accessibility Feature | How to Implement |
|---|---|
Color Contrast | Maintain a minimum 4.5:1 contrast ratio for text and backgrounds. |
Text Readability | Use a 16px base font and scale down slightly (to 14px) for mobile devices. |
Navigation | Make sure keyboard focus states are clear and functional. |
Accessibility isn’t just ethical - it also improves user experience for everyone. And when paired with performance optimization, it creates a seamless experience.
Performance Optimization
Fast-loading pages are non-negotiable. Here's how you can optimize performance:
Image Optimization
Compress images and size them appropriately. This simple step can reduce page weight by as much as 1MB.
Layout Efficiency
Speed matters. Research shows pages that load in 2 seconds experience a 9% bounce rate, compared to 38% for pages taking 5 seconds. In fact, half of users value speed over flashy animations.Mobile-First Approach
Start designing for the smallest screen first (320px Mobile Portrait breakpoint) and scale up. Mobile devices often take up to 70.9% longer to load pages compared to desktops, so efficient design is critical.
7. Practice Finding and Fixing Issues
Now that you've honed your design and performance optimization skills, it's time to focus on troubleshooting. Tackling problems effectively in Webflow and Framer means practicing with real-world scenarios. Here’s how you can sharpen your ability to spot and resolve design hiccups.
Built-in Testing Tools
Both Webflow and Framer come equipped with tools to help you debug like a pro. Webflow’s Audit panel automatically checks accessibility and ensures contrast ratios meet standards. On the other hand, Framer Motion has a debug mode that lets you visualize animation paths. To activate it, simply use this code snippet:
These tools are your first line of defense when it comes to performance testing.
Performance Optimization Workflow
Did you know that even a slight delay in load times can hurt conversion rates? Monitoring the right metrics can make all the difference. Here are the key areas to focus on:
Testing Phase | Key Metrics | Target Values |
|---|---|---|
Initial Load | First Contentful Paint | < 1.5 seconds |
Interaction | Time to Interactive | < 3.0 seconds |
Layout Stability | Cumulative Layout Shift | < 0.1 |
Make these metrics a regular part of your testing process to ensure your site performs at its best.
Real-World Success Stories
Case studies show that faster load times can drastically reduce bounce rates, proving how crucial performance optimization is for user retention.
Common Issues and Solutions
Here are some frequent problems and how to address them:
Image Optimization
Use native compression to significantly reduce file sizes.
Implement lazy loading for images that don’t need to load immediately.
Layout Consistency
Mobile (320px): Look for stacking issues in smaller screens.
Tablet (768px): Ensure smooth menu transitions.
Desktop (992px+): Double-check grid alignment.
Animation Performance
Aim for a framerate of 60fps for fluid transitions.
Use Framer Motion’s debug mode to pinpoint areas causing slowdowns.
Simplify animations that dip below 30fps.
Monthly Maintenance Checklist
Keep your projects running smoothly with a monthly testing routine:
Run Lighthouse audits to spot performance bottlenecks.
Monitor Core Web Vitals using built-in reporting tools.
Test responsive layouts on various devices.
Validate form submissions and interactive elements.
Why is this important? A whopping 82% of consumers say slow page speeds impact their buying decisions. By adopting these practices early, you’ll build the skills needed to create websites and apps that perform seamlessly.
For more advanced tips on debugging and optimization, check out the Webflow and Framer templates available at Offlens Studio. They’re a great resource to take your skills to the next level.
Conclusion
Becoming proficient in Webflow or Framer doesn’t happen overnight, but with consistent practice and the right approach, you can speed up your progress. The tips shared earlier, combined with hands-on experience, will help you move from beginner to expert more effectively.
Your journey can be broken down into clear stages, each building on the last. Here’s how your growth might look:
Learning Phase | Focus Area | Expected Outcome |
|---|---|---|
Foundation | Basic tools and layouts | Confidently navigating the platform |
Development | Official training and simple projects | Building functional components |
Advanced | Community engagement and complex features | Designing professional-level projects |
Mastery | Troubleshooting and optimization | Delivering polished, high-performing results |
The key to real progress is getting your hands dirty - experimenting, testing, and iterating. Along the way, professional resources can help bridge the gap between learning and execution. For example, Offlens Studio offers templates and guidance tailored for tools like Figma, Framer, and Webflow. These resources can help you turn your knowledge into professional-quality projects.
FAQs
What are the key differences between Webflow and Framer, and when should you use each?
Webflow and Framer are both excellent tools, but they cater to different needs depending on the type of project you're working on.
Webflow is perfect for building fully functional, responsive websites with plenty of customization options. It’s a go-to for designers who want to bring their ideas to life as production-ready websites - no extensive coding required. Plus, it offers seamless hosting integration, making it a solid choice for end-to-end website creation.
Framer, meanwhile, excels at creating interactive and visually rich prototypes or landing pages. It’s ideal for projects that need animations, micro-interactions, or user experience testing before diving into full-scale development.
So, how do you decide? If you’re aiming for a complete, polished website, Webflow is your tool. But if you’re focused on crafting dynamic prototypes or smaller, design-heavy projects, Framer is the better fit.
How can I use online communities to improve my skills in Webflow or Framer?
Online communities are an excellent way to dive deeper into Webflow or Framer. By joining spaces like forums, social media groups, or design-centric platforms, you can connect with seasoned users and fellow learners to swap tips, solve problems, and find creative inspiration.
Get involved by joining discussions, asking questions, or showcasing your projects to gather feedback. Many of these communities also offer tutorials, webinars, and challenges that can help you build your skills while keeping you motivated. Being part of these groups not only speeds up your learning process but also keeps you informed about the newest features and techniques for Webflow and Framer.
How can I troubleshoot performance issues in my Webflow or Framer projects?
To address performance issues in your Webflow or Framer projects, start by pinpointing elements that could be slowing things down. Start with images - compress them to minimize load times and ensure you're using the right file formats, like JPEG or PNG for static images and SVG for scalable graphics.
For animations, keep things simple. Limit the number of interactions happening at the same time and avoid overly intricate sequences that could bog down performance.
Next, take a closer look at your project settings. In Webflow, remove unused styles and unnecessary elements to avoid bloating your design. In Framer, focus on keeping components well-organized and avoid too much nesting, which can make your project harder to process.
Make it a habit to preview your project frequently. This lets you test its performance and tweak any problem areas before they become bigger issues. Clean, streamlined designs not only run better but also create a smoother experience for your users.
Related posts
The Ultimate Guide to Product Design for Startups
How to Use Webflow for Faster Design Processes
Webflow vs Framer: Ease of Use for Startups
Design
May 9, 2025
Master the Basics: Get familiar with tools like the Navigator Panel, Design Tools, and Canvas Area.
Use Official Resources: Start with Webflow University and Framer Learn for step-by-step tutorials.
Build Small Projects: Practice by creating simple websites like landing pages or contact forms.
Join Online Communities: Connect with Webflow and Framer forums to get advice, feedback, and inspiration.
Increase Complexity Gradually: Start with static layouts and slowly add animations, interactions, and responsive designs.
Learn Design Methods: Focus on responsive design, accessibility, and performance optimization.
Practice Troubleshooting: Use built-in testing tools to find and fix issues like layout bugs or slow load times.
Quick Comparison: Webflow vs. Framer
Feature | Webflow | Framer |
|---|---|---|
Learning Resources | Webflow University (100+ hours) | Framer Learn (interactive guides) |
Design Focus | Visual coding + responsive design | Prototyping + animations |
Best For | Polished websites | Interactive experiences |
Community | ||
Performance Tools | Audit panel | Debug mode for animations |
Pro Tip: Start small, practice consistently, and use community feedback to improve. Whether you’re a beginner or leveling up, these platforms can help you create professional-quality websites and apps.
Learn Framer For Beginners: Mini Course (2024)
1. Learn the Basic Tools and Layout
Getting comfortable with the basic tools and layout is the first step to creating an efficient design workflow. By understanding how the key features work together, you'll set yourself up for success in your design projects.
Key Areas to Know
Navigator Panel: Found on the left side, this is your go-to for organizing your workspace. It keeps all your elements neatly arranged for quick access.
Design Tools: Located on the right sidebar, these controls let you handle style settings, animations, breakpoints for responsive design, and even preview your work.
Canvas Area: This is the heart of your workspace. Here, you can:
Zoom, pan, and align elements with precision
Switch between desktop and mobile views
Preview interactions as you build them
Tips to Build Confidence with the Tools
Learn and use keyboard shortcuts - they’ll save you tons of time.
Keep your layers and components organized from the start to avoid confusion later.
Save your work often and use version control to track changes.
Spend time experimenting on a blank canvas. It’s a great way to build muscle memory and get a deeper understanding of the tools.
2. Use Official Training Materials
If you're serious about mastering Webflow or Framer, their official training materials should be your go-to resource.
Official Learning Paths
Both platforms provide structured courses to help you level up:
Webflow University: This free platform offers over 100 hours of video tutorials. You'll find everything from basic navigation to advanced animations and interactions.
Framer Learn: An interactive hub packed with tutorials, video guides, and hands-on exercises.
Once you’ve absorbed the lessons, put your knowledge to work through practice.
Getting the Most Out of Official Resources
Start with the foundational courses. These will guide you through essential skills like navigating the interface, creating components, responsive design, and animation basics. Stick to the recommended sequence to ensure you don’t miss any critical steps.
Add-On Learning Tools
While official resources are your main focus, you can deepen your understanding with these extras:
Documentation: The official docs are perfect for quick lookups and clarifications.
Templates: Study official templates to see how experts structure projects.
Community Projects: Browse showcase galleries to get inspired by real-world examples.
These supplementary tools help connect the dots between theory and hands-on application.
Practice Makes Perfect
Don’t just watch or read - practice! Complete every exercise to solidify your skills.
Pro Tip: Set up a dedicated practice project where you can freely experiment with the techniques you’re learning. It’s a safe space to try things out without the fear of messing up a live project.
3. Build Simple Test Projects
Once you've got the basics down, it's time to put your skills to work with small, manageable projects. These exercises will not only boost your confidence but also help you get a deeper understanding of key features in tools like Webflow or Framer.
Start with Straightforward Projects
Kick things off with simple ideas like a personal landing page, a product showcase, or a basic contact form. These types of projects are great for mastering core functionalities without feeling overwhelmed.
Set Realistic Deadlines
Sometimes, all it takes is focused effort to create something impressive in a short time. Offlens Studio has demonstrated this by completing a landing page project in less than 24 hours.
Louis (@louiss) shared his experience:
"I worked with them to launch my landing page. They said they could do the job in under 24 hours and that is exactly what they did. Super happy about the result, it's exactly what I wanted and described to them. 10/10 Would absolutely recommend them to build and launch landing pages."
Simplify Complex Features
When tackling more advanced features, break them into smaller, manageable steps:
Start with Structure: Build the basic layout to establish the framework.
Add Styling: Focus on typography, colors, and overall design aesthetics.
Implement Interactions: Introduce simple animations or hover effects.
Test Responsiveness: Make sure everything looks and works well on mobile devices.
Prioritize Quality Over Speed
While quick turnarounds can be impressive, taking the time to fully understand each feature will lead to better results in the long run.
Perrin (@perrrrrrin) praised a similar approach:
"They were absolutely amazing for the Figma and Framer work. They understood the task in one sentence, and got the job done in 12 hours!! I was expecting a few days but they really went above and beyond with speed and quality. Highly recommend them."
Stay Organized
Good organization is key to a smooth workflow. Use clear folder structures and consistently name your components. As you go, document what you learn and thoroughly test your work before moving on to the next step.
Once you’ve nailed a few basic projects, you can start pushing yourself with more complex challenges. Each step will bring you closer to mastering these tools.
4. Join Online Design Groups
Once you've got a handle on the tools and have started building projects, connecting with other designers can take your skills to the next level. Joining online design communities is a great way to sharpen your Webflow or Framer expertise while learning from others.
Where to Find Support
Online communities like the Webflow Forum and Framer Community are treasure troves of advice and inspiration. Here's what you can gain by being part of these groups:
Get help with technical questions
Share your work and receive constructive feedback
Learn best practices from experienced designers
Explore new techniques and platform features
Build connections with like-minded creatives
These spaces are perfect for solving problems quickly and learning actively through collaboration.
Making the Most of Community Resources
Dive in by introducing yourself and sharing your learning goals. This not only helps others understand how they can assist you but also lays the foundation for meaningful interactions. Posting your progress - complete with before-and-after examples or challenges you've tackled - can solidify your learning and inspire others.
Stay in the Loop with Platform Updates
One of the biggest perks of being part of these groups? Staying informed about platform updates and trends. Community discussions often highlight:
New feature rollouts and how to use them
Workflow changes caused by updates
Practical solutions for common issues
Insights into emerging design trends
By keeping up with these conversations, you can adapt quickly and stay ahead of the curve.
How to Engage Effectively
To get the most out of these communities, focus on meaningful participation. Here are some tips:
Clearly explain your goals or the challenges you're facing
Include screenshots or links to provide context
Follow up on threads with updates or solutions you’ve discovered
Share your knowledge as you grow to help others
Even after you've mastered the basics, these communities can remain an invaluable resource. Regularly engaging with them ensures your skills stay sharp and keeps you connected to the latest in design and platform advancements.
5. Increase Project Difficulty Slowly
The best way to grow your skills is by taking it step by step. Start with the basics and work your way up to more challenging tasks. This approach helps you build confidence while avoiding burnout.
Start with Simple Layouts
Begin by designing clean, static layouts. Focus on organizing elements, perfecting spacing, and ensuring responsiveness. This will give you a solid grasp of layout structure and typography, which are essential building blocks for any project.
Add Complexity Gradually
Once you’re comfortable with basic layouts, challenge yourself by recreating existing websites or templates. Slowly introduce interactive features like hover effects and smooth transitions. This steady progression allows you to expand your abilities without feeling overwhelmed.
Practice to Build Confidence
Every project you complete strengthens your foundation and boosts your confidence. By starting small and gradually increasing the complexity, you’ll develop the practical skills needed to tackle advanced projects with ease.
6. Study Common Design Methods
Getting a handle on design fundamentals in tools like Webflow and Framer can make your learning curve much smoother. Start by focusing on these three key areas:
Responsive Design Fundamentals
Responsive design is all about creating layouts that adapt seamlessly across devices. Here's how you can structure your layouts effectively:
Desktop (992px and up): Stick to a 12-column grid system for clean, organized layouts.
Tablet (768–991px): Simplify the design with a 2-column layout for better usability.
Mobile (below 768px): Shift to a single-column stack to ensure everything fits neatly on smaller screens.
Both Webflow and Framer offer tools to handle these transitions, with Webflow using predefined breakpoints and Framer allowing custom ones. These practices also align with accessibility and performance goals.
Accessibility Best Practices
Good design is inclusive. Focus on these accessibility elements to ensure your designs work for everyone:
Accessibility Feature | How to Implement |
|---|---|
Color Contrast | Maintain a minimum 4.5:1 contrast ratio for text and backgrounds. |
Text Readability | Use a 16px base font and scale down slightly (to 14px) for mobile devices. |
Navigation | Make sure keyboard focus states are clear and functional. |
Accessibility isn’t just ethical - it also improves user experience for everyone. And when paired with performance optimization, it creates a seamless experience.
Performance Optimization
Fast-loading pages are non-negotiable. Here's how you can optimize performance:
Image Optimization
Compress images and size them appropriately. This simple step can reduce page weight by as much as 1MB.
Layout Efficiency
Speed matters. Research shows pages that load in 2 seconds experience a 9% bounce rate, compared to 38% for pages taking 5 seconds. In fact, half of users value speed over flashy animations.Mobile-First Approach
Start designing for the smallest screen first (320px Mobile Portrait breakpoint) and scale up. Mobile devices often take up to 70.9% longer to load pages compared to desktops, so efficient design is critical.
7. Practice Finding and Fixing Issues
Now that you've honed your design and performance optimization skills, it's time to focus on troubleshooting. Tackling problems effectively in Webflow and Framer means practicing with real-world scenarios. Here’s how you can sharpen your ability to spot and resolve design hiccups.
Built-in Testing Tools
Both Webflow and Framer come equipped with tools to help you debug like a pro. Webflow’s Audit panel automatically checks accessibility and ensures contrast ratios meet standards. On the other hand, Framer Motion has a debug mode that lets you visualize animation paths. To activate it, simply use this code snippet:
These tools are your first line of defense when it comes to performance testing.
Performance Optimization Workflow
Did you know that even a slight delay in load times can hurt conversion rates? Monitoring the right metrics can make all the difference. Here are the key areas to focus on:
Testing Phase | Key Metrics | Target Values |
|---|---|---|
Initial Load | First Contentful Paint | < 1.5 seconds |
Interaction | Time to Interactive | < 3.0 seconds |
Layout Stability | Cumulative Layout Shift | < 0.1 |
Make these metrics a regular part of your testing process to ensure your site performs at its best.
Real-World Success Stories
Case studies show that faster load times can drastically reduce bounce rates, proving how crucial performance optimization is for user retention.
Common Issues and Solutions
Here are some frequent problems and how to address them:
Image Optimization
Use native compression to significantly reduce file sizes.
Implement lazy loading for images that don’t need to load immediately.
Layout Consistency
Mobile (320px): Look for stacking issues in smaller screens.
Tablet (768px): Ensure smooth menu transitions.
Desktop (992px+): Double-check grid alignment.
Animation Performance
Aim for a framerate of 60fps for fluid transitions.
Use Framer Motion’s debug mode to pinpoint areas causing slowdowns.
Simplify animations that dip below 30fps.
Monthly Maintenance Checklist
Keep your projects running smoothly with a monthly testing routine:
Run Lighthouse audits to spot performance bottlenecks.
Monitor Core Web Vitals using built-in reporting tools.
Test responsive layouts on various devices.
Validate form submissions and interactive elements.
Why is this important? A whopping 82% of consumers say slow page speeds impact their buying decisions. By adopting these practices early, you’ll build the skills needed to create websites and apps that perform seamlessly.
For more advanced tips on debugging and optimization, check out the Webflow and Framer templates available at Offlens Studio. They’re a great resource to take your skills to the next level.
Conclusion
Becoming proficient in Webflow or Framer doesn’t happen overnight, but with consistent practice and the right approach, you can speed up your progress. The tips shared earlier, combined with hands-on experience, will help you move from beginner to expert more effectively.
Your journey can be broken down into clear stages, each building on the last. Here’s how your growth might look:
Learning Phase | Focus Area | Expected Outcome |
|---|---|---|
Foundation | Basic tools and layouts | Confidently navigating the platform |
Development | Official training and simple projects | Building functional components |
Advanced | Community engagement and complex features | Designing professional-level projects |
Mastery | Troubleshooting and optimization | Delivering polished, high-performing results |
The key to real progress is getting your hands dirty - experimenting, testing, and iterating. Along the way, professional resources can help bridge the gap between learning and execution. For example, Offlens Studio offers templates and guidance tailored for tools like Figma, Framer, and Webflow. These resources can help you turn your knowledge into professional-quality projects.
FAQs
What are the key differences between Webflow and Framer, and when should you use each?
Webflow and Framer are both excellent tools, but they cater to different needs depending on the type of project you're working on.
Webflow is perfect for building fully functional, responsive websites with plenty of customization options. It’s a go-to for designers who want to bring their ideas to life as production-ready websites - no extensive coding required. Plus, it offers seamless hosting integration, making it a solid choice for end-to-end website creation.
Framer, meanwhile, excels at creating interactive and visually rich prototypes or landing pages. It’s ideal for projects that need animations, micro-interactions, or user experience testing before diving into full-scale development.
So, how do you decide? If you’re aiming for a complete, polished website, Webflow is your tool. But if you’re focused on crafting dynamic prototypes or smaller, design-heavy projects, Framer is the better fit.
How can I use online communities to improve my skills in Webflow or Framer?
Online communities are an excellent way to dive deeper into Webflow or Framer. By joining spaces like forums, social media groups, or design-centric platforms, you can connect with seasoned users and fellow learners to swap tips, solve problems, and find creative inspiration.
Get involved by joining discussions, asking questions, or showcasing your projects to gather feedback. Many of these communities also offer tutorials, webinars, and challenges that can help you build your skills while keeping you motivated. Being part of these groups not only speeds up your learning process but also keeps you informed about the newest features and techniques for Webflow and Framer.
How can I troubleshoot performance issues in my Webflow or Framer projects?
To address performance issues in your Webflow or Framer projects, start by pinpointing elements that could be slowing things down. Start with images - compress them to minimize load times and ensure you're using the right file formats, like JPEG or PNG for static images and SVG for scalable graphics.
For animations, keep things simple. Limit the number of interactions happening at the same time and avoid overly intricate sequences that could bog down performance.
Next, take a closer look at your project settings. In Webflow, remove unused styles and unnecessary elements to avoid bloating your design. In Framer, focus on keeping components well-organized and avoid too much nesting, which can make your project harder to process.
Make it a habit to preview your project frequently. This lets you test its performance and tweak any problem areas before they become bigger issues. Clean, streamlined designs not only run better but also create a smoother experience for your users.
Related posts
The Ultimate Guide to Product Design for Startups
How to Use Webflow for Faster Design Processes
Webflow vs Framer: Ease of Use for Startups
Design
May 6, 2025
Master the Basics: Get familiar with tools like the Navigator Panel, Design Tools, and Canvas Area.
Use Official Resources: Start with Webflow University and Framer Learn for step-by-step tutorials.
Build Small Projects: Practice by creating simple websites like landing pages or contact forms.
Join Online Communities: Connect with Webflow and Framer forums to get advice, feedback, and inspiration.
Increase Complexity Gradually: Start with static layouts and slowly add animations, interactions, and responsive designs.
Learn Design Methods: Focus on responsive design, accessibility, and performance optimization.
Practice Troubleshooting: Use built-in testing tools to find and fix issues like layout bugs or slow load times.
Quick Comparison: Webflow vs. Framer
Feature | Webflow | Framer |
|---|---|---|
Learning Resources | Webflow University (100+ hours) | Framer Learn (interactive guides) |
Design Focus | Visual coding + responsive design | Prototyping + animations |
Best For | Polished websites | Interactive experiences |
Community | ||
Performance Tools | Audit panel | Debug mode for animations |
Pro Tip: Start small, practice consistently, and use community feedback to improve. Whether you’re a beginner or leveling up, these platforms can help you create professional-quality websites and apps.
Learn Framer For Beginners: Mini Course (2024)
1. Learn the Basic Tools and Layout
Getting comfortable with the basic tools and layout is the first step to creating an efficient design workflow. By understanding how the key features work together, you'll set yourself up for success in your design projects.
Key Areas to Know
Navigator Panel: Found on the left side, this is your go-to for organizing your workspace. It keeps all your elements neatly arranged for quick access.
Design Tools: Located on the right sidebar, these controls let you handle style settings, animations, breakpoints for responsive design, and even preview your work.
Canvas Area: This is the heart of your workspace. Here, you can:
Zoom, pan, and align elements with precision
Switch between desktop and mobile views
Preview interactions as you build them
Tips to Build Confidence with the Tools
Learn and use keyboard shortcuts - they’ll save you tons of time.
Keep your layers and components organized from the start to avoid confusion later.
Save your work often and use version control to track changes.
Spend time experimenting on a blank canvas. It’s a great way to build muscle memory and get a deeper understanding of the tools.
2. Use Official Training Materials
If you're serious about mastering Webflow or Framer, their official training materials should be your go-to resource.
Official Learning Paths
Both platforms provide structured courses to help you level up:
Webflow University: This free platform offers over 100 hours of video tutorials. You'll find everything from basic navigation to advanced animations and interactions.
Framer Learn: An interactive hub packed with tutorials, video guides, and hands-on exercises.
Once you’ve absorbed the lessons, put your knowledge to work through practice.
Getting the Most Out of Official Resources
Start with the foundational courses. These will guide you through essential skills like navigating the interface, creating components, responsive design, and animation basics. Stick to the recommended sequence to ensure you don’t miss any critical steps.
Add-On Learning Tools
While official resources are your main focus, you can deepen your understanding with these extras:
Documentation: The official docs are perfect for quick lookups and clarifications.
Templates: Study official templates to see how experts structure projects.
Community Projects: Browse showcase galleries to get inspired by real-world examples.
These supplementary tools help connect the dots between theory and hands-on application.
Practice Makes Perfect
Don’t just watch or read - practice! Complete every exercise to solidify your skills.
Pro Tip: Set up a dedicated practice project where you can freely experiment with the techniques you’re learning. It’s a safe space to try things out without the fear of messing up a live project.
3. Build Simple Test Projects
Once you've got the basics down, it's time to put your skills to work with small, manageable projects. These exercises will not only boost your confidence but also help you get a deeper understanding of key features in tools like Webflow or Framer.
Start with Straightforward Projects
Kick things off with simple ideas like a personal landing page, a product showcase, or a basic contact form. These types of projects are great for mastering core functionalities without feeling overwhelmed.
Set Realistic Deadlines
Sometimes, all it takes is focused effort to create something impressive in a short time. Offlens Studio has demonstrated this by completing a landing page project in less than 24 hours.
Louis (@louiss) shared his experience:
"I worked with them to launch my landing page. They said they could do the job in under 24 hours and that is exactly what they did. Super happy about the result, it's exactly what I wanted and described to them. 10/10 Would absolutely recommend them to build and launch landing pages."
Simplify Complex Features
When tackling more advanced features, break them into smaller, manageable steps:
Start with Structure: Build the basic layout to establish the framework.
Add Styling: Focus on typography, colors, and overall design aesthetics.
Implement Interactions: Introduce simple animations or hover effects.
Test Responsiveness: Make sure everything looks and works well on mobile devices.
Prioritize Quality Over Speed
While quick turnarounds can be impressive, taking the time to fully understand each feature will lead to better results in the long run.
Perrin (@perrrrrrin) praised a similar approach:
"They were absolutely amazing for the Figma and Framer work. They understood the task in one sentence, and got the job done in 12 hours!! I was expecting a few days but they really went above and beyond with speed and quality. Highly recommend them."
Stay Organized
Good organization is key to a smooth workflow. Use clear folder structures and consistently name your components. As you go, document what you learn and thoroughly test your work before moving on to the next step.
Once you’ve nailed a few basic projects, you can start pushing yourself with more complex challenges. Each step will bring you closer to mastering these tools.
4. Join Online Design Groups
Once you've got a handle on the tools and have started building projects, connecting with other designers can take your skills to the next level. Joining online design communities is a great way to sharpen your Webflow or Framer expertise while learning from others.
Where to Find Support
Online communities like the Webflow Forum and Framer Community are treasure troves of advice and inspiration. Here's what you can gain by being part of these groups:
Get help with technical questions
Share your work and receive constructive feedback
Learn best practices from experienced designers
Explore new techniques and platform features
Build connections with like-minded creatives
These spaces are perfect for solving problems quickly and learning actively through collaboration.
Making the Most of Community Resources
Dive in by introducing yourself and sharing your learning goals. This not only helps others understand how they can assist you but also lays the foundation for meaningful interactions. Posting your progress - complete with before-and-after examples or challenges you've tackled - can solidify your learning and inspire others.
Stay in the Loop with Platform Updates
One of the biggest perks of being part of these groups? Staying informed about platform updates and trends. Community discussions often highlight:
New feature rollouts and how to use them
Workflow changes caused by updates
Practical solutions for common issues
Insights into emerging design trends
By keeping up with these conversations, you can adapt quickly and stay ahead of the curve.
How to Engage Effectively
To get the most out of these communities, focus on meaningful participation. Here are some tips:
Clearly explain your goals or the challenges you're facing
Include screenshots or links to provide context
Follow up on threads with updates or solutions you’ve discovered
Share your knowledge as you grow to help others
Even after you've mastered the basics, these communities can remain an invaluable resource. Regularly engaging with them ensures your skills stay sharp and keeps you connected to the latest in design and platform advancements.
5. Increase Project Difficulty Slowly
The best way to grow your skills is by taking it step by step. Start with the basics and work your way up to more challenging tasks. This approach helps you build confidence while avoiding burnout.
Start with Simple Layouts
Begin by designing clean, static layouts. Focus on organizing elements, perfecting spacing, and ensuring responsiveness. This will give you a solid grasp of layout structure and typography, which are essential building blocks for any project.
Add Complexity Gradually
Once you’re comfortable with basic layouts, challenge yourself by recreating existing websites or templates. Slowly introduce interactive features like hover effects and smooth transitions. This steady progression allows you to expand your abilities without feeling overwhelmed.
Practice to Build Confidence
Every project you complete strengthens your foundation and boosts your confidence. By starting small and gradually increasing the complexity, you’ll develop the practical skills needed to tackle advanced projects with ease.
6. Study Common Design Methods
Getting a handle on design fundamentals in tools like Webflow and Framer can make your learning curve much smoother. Start by focusing on these three key areas:
Responsive Design Fundamentals
Responsive design is all about creating layouts that adapt seamlessly across devices. Here's how you can structure your layouts effectively:
Desktop (992px and up): Stick to a 12-column grid system for clean, organized layouts.
Tablet (768–991px): Simplify the design with a 2-column layout for better usability.
Mobile (below 768px): Shift to a single-column stack to ensure everything fits neatly on smaller screens.
Both Webflow and Framer offer tools to handle these transitions, with Webflow using predefined breakpoints and Framer allowing custom ones. These practices also align with accessibility and performance goals.
Accessibility Best Practices
Good design is inclusive. Focus on these accessibility elements to ensure your designs work for everyone:
Accessibility Feature | How to Implement |
|---|---|
Color Contrast | Maintain a minimum 4.5:1 contrast ratio for text and backgrounds. |
Text Readability | Use a 16px base font and scale down slightly (to 14px) for mobile devices. |
Navigation | Make sure keyboard focus states are clear and functional. |
Accessibility isn’t just ethical - it also improves user experience for everyone. And when paired with performance optimization, it creates a seamless experience.
Performance Optimization
Fast-loading pages are non-negotiable. Here's how you can optimize performance:
Image Optimization
Compress images and size them appropriately. This simple step can reduce page weight by as much as 1MB.
Layout Efficiency
Speed matters. Research shows pages that load in 2 seconds experience a 9% bounce rate, compared to 38% for pages taking 5 seconds. In fact, half of users value speed over flashy animations.Mobile-First Approach
Start designing for the smallest screen first (320px Mobile Portrait breakpoint) and scale up. Mobile devices often take up to 70.9% longer to load pages compared to desktops, so efficient design is critical.
7. Practice Finding and Fixing Issues
Now that you've honed your design and performance optimization skills, it's time to focus on troubleshooting. Tackling problems effectively in Webflow and Framer means practicing with real-world scenarios. Here’s how you can sharpen your ability to spot and resolve design hiccups.
Built-in Testing Tools
Both Webflow and Framer come equipped with tools to help you debug like a pro. Webflow’s Audit panel automatically checks accessibility and ensures contrast ratios meet standards. On the other hand, Framer Motion has a debug mode that lets you visualize animation paths. To activate it, simply use this code snippet:
These tools are your first line of defense when it comes to performance testing.
Performance Optimization Workflow
Did you know that even a slight delay in load times can hurt conversion rates? Monitoring the right metrics can make all the difference. Here are the key areas to focus on:
Testing Phase | Key Metrics | Target Values |
|---|---|---|
Initial Load | First Contentful Paint | < 1.5 seconds |
Interaction | Time to Interactive | < 3.0 seconds |
Layout Stability | Cumulative Layout Shift | < 0.1 |
Make these metrics a regular part of your testing process to ensure your site performs at its best.
Real-World Success Stories
Case studies show that faster load times can drastically reduce bounce rates, proving how crucial performance optimization is for user retention.
Common Issues and Solutions
Here are some frequent problems and how to address them:
Image Optimization
Use native compression to significantly reduce file sizes.
Implement lazy loading for images that don’t need to load immediately.
Layout Consistency
Mobile (320px): Look for stacking issues in smaller screens.
Tablet (768px): Ensure smooth menu transitions.
Desktop (992px+): Double-check grid alignment.
Animation Performance
Aim for a framerate of 60fps for fluid transitions.
Use Framer Motion’s debug mode to pinpoint areas causing slowdowns.
Simplify animations that dip below 30fps.
Monthly Maintenance Checklist
Keep your projects running smoothly with a monthly testing routine:
Run Lighthouse audits to spot performance bottlenecks.
Monitor Core Web Vitals using built-in reporting tools.
Test responsive layouts on various devices.
Validate form submissions and interactive elements.
Why is this important? A whopping 82% of consumers say slow page speeds impact their buying decisions. By adopting these practices early, you’ll build the skills needed to create websites and apps that perform seamlessly.
For more advanced tips on debugging and optimization, check out the Webflow and Framer templates available at Offlens Studio. They’re a great resource to take your skills to the next level.
Conclusion
Becoming proficient in Webflow or Framer doesn’t happen overnight, but with consistent practice and the right approach, you can speed up your progress. The tips shared earlier, combined with hands-on experience, will help you move from beginner to expert more effectively.
Your journey can be broken down into clear stages, each building on the last. Here’s how your growth might look:
Learning Phase | Focus Area | Expected Outcome |
|---|---|---|
Foundation | Basic tools and layouts | Confidently navigating the platform |
Development | Official training and simple projects | Building functional components |
Advanced | Community engagement and complex features | Designing professional-level projects |
Mastery | Troubleshooting and optimization | Delivering polished, high-performing results |
The key to real progress is getting your hands dirty - experimenting, testing, and iterating. Along the way, professional resources can help bridge the gap between learning and execution. For example, Offlens Studio offers templates and guidance tailored for tools like Figma, Framer, and Webflow. These resources can help you turn your knowledge into professional-quality projects.
FAQs
What are the key differences between Webflow and Framer, and when should you use each?
Webflow and Framer are both excellent tools, but they cater to different needs depending on the type of project you're working on.
Webflow is perfect for building fully functional, responsive websites with plenty of customization options. It’s a go-to for designers who want to bring their ideas to life as production-ready websites - no extensive coding required. Plus, it offers seamless hosting integration, making it a solid choice for end-to-end website creation.
Framer, meanwhile, excels at creating interactive and visually rich prototypes or landing pages. It’s ideal for projects that need animations, micro-interactions, or user experience testing before diving into full-scale development.
So, how do you decide? If you’re aiming for a complete, polished website, Webflow is your tool. But if you’re focused on crafting dynamic prototypes or smaller, design-heavy projects, Framer is the better fit.
How can I use online communities to improve my skills in Webflow or Framer?
Online communities are an excellent way to dive deeper into Webflow or Framer. By joining spaces like forums, social media groups, or design-centric platforms, you can connect with seasoned users and fellow learners to swap tips, solve problems, and find creative inspiration.
Get involved by joining discussions, asking questions, or showcasing your projects to gather feedback. Many of these communities also offer tutorials, webinars, and challenges that can help you build your skills while keeping you motivated. Being part of these groups not only speeds up your learning process but also keeps you informed about the newest features and techniques for Webflow and Framer.
How can I troubleshoot performance issues in my Webflow or Framer projects?
To address performance issues in your Webflow or Framer projects, start by pinpointing elements that could be slowing things down. Start with images - compress them to minimize load times and ensure you're using the right file formats, like JPEG or PNG for static images and SVG for scalable graphics.
For animations, keep things simple. Limit the number of interactions happening at the same time and avoid overly intricate sequences that could bog down performance.
Next, take a closer look at your project settings. In Webflow, remove unused styles and unnecessary elements to avoid bloating your design. In Framer, focus on keeping components well-organized and avoid too much nesting, which can make your project harder to process.
Make it a habit to preview your project frequently. This lets you test its performance and tweak any problem areas before they become bigger issues. Clean, streamlined designs not only run better but also create a smoother experience for your users.
Related posts
The Ultimate Guide to Product Design for Startups
How to Use Webflow for Faster Design Processes
Webflow vs Framer: Ease of Use for Startups
Design
May 7, 2025
Master the Basics: Get familiar with tools like the Navigator Panel, Design Tools, and Canvas Area.
Use Official Resources: Start with Webflow University and Framer Learn for step-by-step tutorials.
Build Small Projects: Practice by creating simple websites like landing pages or contact forms.
Join Online Communities: Connect with Webflow and Framer forums to get advice, feedback, and inspiration.
Increase Complexity Gradually: Start with static layouts and slowly add animations, interactions, and responsive designs.
Learn Design Methods: Focus on responsive design, accessibility, and performance optimization.
Practice Troubleshooting: Use built-in testing tools to find and fix issues like layout bugs or slow load times.
Quick Comparison: Webflow vs. Framer
Feature | Webflow | Framer |
|---|---|---|
Learning Resources | Webflow University (100+ hours) | Framer Learn (interactive guides) |
Design Focus | Visual coding + responsive design | Prototyping + animations |
Best For | Polished websites | Interactive experiences |
Community | ||
Performance Tools | Audit panel | Debug mode for animations |
Pro Tip: Start small, practice consistently, and use community feedback to improve. Whether you’re a beginner or leveling up, these platforms can help you create professional-quality websites and apps.
Learn Framer For Beginners: Mini Course (2024)
1. Learn the Basic Tools and Layout
Getting comfortable with the basic tools and layout is the first step to creating an efficient design workflow. By understanding how the key features work together, you'll set yourself up for success in your design projects.
Key Areas to Know
Navigator Panel: Found on the left side, this is your go-to for organizing your workspace. It keeps all your elements neatly arranged for quick access.
Design Tools: Located on the right sidebar, these controls let you handle style settings, animations, breakpoints for responsive design, and even preview your work.
Canvas Area: This is the heart of your workspace. Here, you can:
Zoom, pan, and align elements with precision
Switch between desktop and mobile views
Preview interactions as you build them
Tips to Build Confidence with the Tools
Learn and use keyboard shortcuts - they’ll save you tons of time.
Keep your layers and components organized from the start to avoid confusion later.
Save your work often and use version control to track changes.
Spend time experimenting on a blank canvas. It’s a great way to build muscle memory and get a deeper understanding of the tools.
2. Use Official Training Materials
If you're serious about mastering Webflow or Framer, their official training materials should be your go-to resource.
Official Learning Paths
Both platforms provide structured courses to help you level up:
Webflow University: This free platform offers over 100 hours of video tutorials. You'll find everything from basic navigation to advanced animations and interactions.
Framer Learn: An interactive hub packed with tutorials, video guides, and hands-on exercises.
Once you’ve absorbed the lessons, put your knowledge to work through practice.
Getting the Most Out of Official Resources
Start with the foundational courses. These will guide you through essential skills like navigating the interface, creating components, responsive design, and animation basics. Stick to the recommended sequence to ensure you don’t miss any critical steps.
Add-On Learning Tools
While official resources are your main focus, you can deepen your understanding with these extras:
Documentation: The official docs are perfect for quick lookups and clarifications.
Templates: Study official templates to see how experts structure projects.
Community Projects: Browse showcase galleries to get inspired by real-world examples.
These supplementary tools help connect the dots between theory and hands-on application.
Practice Makes Perfect
Don’t just watch or read - practice! Complete every exercise to solidify your skills.
Pro Tip: Set up a dedicated practice project where you can freely experiment with the techniques you’re learning. It’s a safe space to try things out without the fear of messing up a live project.
3. Build Simple Test Projects
Once you've got the basics down, it's time to put your skills to work with small, manageable projects. These exercises will not only boost your confidence but also help you get a deeper understanding of key features in tools like Webflow or Framer.
Start with Straightforward Projects
Kick things off with simple ideas like a personal landing page, a product showcase, or a basic contact form. These types of projects are great for mastering core functionalities without feeling overwhelmed.
Set Realistic Deadlines
Sometimes, all it takes is focused effort to create something impressive in a short time. Offlens Studio has demonstrated this by completing a landing page project in less than 24 hours.
Louis (@louiss) shared his experience:
"I worked with them to launch my landing page. They said they could do the job in under 24 hours and that is exactly what they did. Super happy about the result, it's exactly what I wanted and described to them. 10/10 Would absolutely recommend them to build and launch landing pages."
Simplify Complex Features
When tackling more advanced features, break them into smaller, manageable steps:
Start with Structure: Build the basic layout to establish the framework.
Add Styling: Focus on typography, colors, and overall design aesthetics.
Implement Interactions: Introduce simple animations or hover effects.
Test Responsiveness: Make sure everything looks and works well on mobile devices.
Prioritize Quality Over Speed
While quick turnarounds can be impressive, taking the time to fully understand each feature will lead to better results in the long run.
Perrin (@perrrrrrin) praised a similar approach:
"They were absolutely amazing for the Figma and Framer work. They understood the task in one sentence, and got the job done in 12 hours!! I was expecting a few days but they really went above and beyond with speed and quality. Highly recommend them."
Stay Organized
Good organization is key to a smooth workflow. Use clear folder structures and consistently name your components. As you go, document what you learn and thoroughly test your work before moving on to the next step.
Once you’ve nailed a few basic projects, you can start pushing yourself with more complex challenges. Each step will bring you closer to mastering these tools.
4. Join Online Design Groups
Once you've got a handle on the tools and have started building projects, connecting with other designers can take your skills to the next level. Joining online design communities is a great way to sharpen your Webflow or Framer expertise while learning from others.
Where to Find Support
Online communities like the Webflow Forum and Framer Community are treasure troves of advice and inspiration. Here's what you can gain by being part of these groups:
Get help with technical questions
Share your work and receive constructive feedback
Learn best practices from experienced designers
Explore new techniques and platform features
Build connections with like-minded creatives
These spaces are perfect for solving problems quickly and learning actively through collaboration.
Making the Most of Community Resources
Dive in by introducing yourself and sharing your learning goals. This not only helps others understand how they can assist you but also lays the foundation for meaningful interactions. Posting your progress - complete with before-and-after examples or challenges you've tackled - can solidify your learning and inspire others.
Stay in the Loop with Platform Updates
One of the biggest perks of being part of these groups? Staying informed about platform updates and trends. Community discussions often highlight:
New feature rollouts and how to use them
Workflow changes caused by updates
Practical solutions for common issues
Insights into emerging design trends
By keeping up with these conversations, you can adapt quickly and stay ahead of the curve.
How to Engage Effectively
To get the most out of these communities, focus on meaningful participation. Here are some tips:
Clearly explain your goals or the challenges you're facing
Include screenshots or links to provide context
Follow up on threads with updates or solutions you’ve discovered
Share your knowledge as you grow to help others
Even after you've mastered the basics, these communities can remain an invaluable resource. Regularly engaging with them ensures your skills stay sharp and keeps you connected to the latest in design and platform advancements.
5. Increase Project Difficulty Slowly
The best way to grow your skills is by taking it step by step. Start with the basics and work your way up to more challenging tasks. This approach helps you build confidence while avoiding burnout.
Start with Simple Layouts
Begin by designing clean, static layouts. Focus on organizing elements, perfecting spacing, and ensuring responsiveness. This will give you a solid grasp of layout structure and typography, which are essential building blocks for any project.
Add Complexity Gradually
Once you’re comfortable with basic layouts, challenge yourself by recreating existing websites or templates. Slowly introduce interactive features like hover effects and smooth transitions. This steady progression allows you to expand your abilities without feeling overwhelmed.
Practice to Build Confidence
Every project you complete strengthens your foundation and boosts your confidence. By starting small and gradually increasing the complexity, you’ll develop the practical skills needed to tackle advanced projects with ease.
6. Study Common Design Methods
Getting a handle on design fundamentals in tools like Webflow and Framer can make your learning curve much smoother. Start by focusing on these three key areas:
Responsive Design Fundamentals
Responsive design is all about creating layouts that adapt seamlessly across devices. Here's how you can structure your layouts effectively:
Desktop (992px and up): Stick to a 12-column grid system for clean, organized layouts.
Tablet (768–991px): Simplify the design with a 2-column layout for better usability.
Mobile (below 768px): Shift to a single-column stack to ensure everything fits neatly on smaller screens.
Both Webflow and Framer offer tools to handle these transitions, with Webflow using predefined breakpoints and Framer allowing custom ones. These practices also align with accessibility and performance goals.
Accessibility Best Practices
Good design is inclusive. Focus on these accessibility elements to ensure your designs work for everyone:
Accessibility Feature | How to Implement |
|---|---|
Color Contrast | Maintain a minimum 4.5:1 contrast ratio for text and backgrounds. |
Text Readability | Use a 16px base font and scale down slightly (to 14px) for mobile devices. |
Navigation | Make sure keyboard focus states are clear and functional. |
Accessibility isn’t just ethical - it also improves user experience for everyone. And when paired with performance optimization, it creates a seamless experience.
Performance Optimization
Fast-loading pages are non-negotiable. Here's how you can optimize performance:
Image Optimization
Compress images and size them appropriately. This simple step can reduce page weight by as much as 1MB.
Layout Efficiency
Speed matters. Research shows pages that load in 2 seconds experience a 9% bounce rate, compared to 38% for pages taking 5 seconds. In fact, half of users value speed over flashy animations.Mobile-First Approach
Start designing for the smallest screen first (320px Mobile Portrait breakpoint) and scale up. Mobile devices often take up to 70.9% longer to load pages compared to desktops, so efficient design is critical.
7. Practice Finding and Fixing Issues
Now that you've honed your design and performance optimization skills, it's time to focus on troubleshooting. Tackling problems effectively in Webflow and Framer means practicing with real-world scenarios. Here’s how you can sharpen your ability to spot and resolve design hiccups.
Built-in Testing Tools
Both Webflow and Framer come equipped with tools to help you debug like a pro. Webflow’s Audit panel automatically checks accessibility and ensures contrast ratios meet standards. On the other hand, Framer Motion has a debug mode that lets you visualize animation paths. To activate it, simply use this code snippet:
These tools are your first line of defense when it comes to performance testing.
Performance Optimization Workflow
Did you know that even a slight delay in load times can hurt conversion rates? Monitoring the right metrics can make all the difference. Here are the key areas to focus on:
Testing Phase | Key Metrics | Target Values |
|---|---|---|
Initial Load | First Contentful Paint | < 1.5 seconds |
Interaction | Time to Interactive | < 3.0 seconds |
Layout Stability | Cumulative Layout Shift | < 0.1 |
Make these metrics a regular part of your testing process to ensure your site performs at its best.
Real-World Success Stories
Case studies show that faster load times can drastically reduce bounce rates, proving how crucial performance optimization is for user retention.
Common Issues and Solutions
Here are some frequent problems and how to address them:
Image Optimization
Use native compression to significantly reduce file sizes.
Implement lazy loading for images that don’t need to load immediately.
Layout Consistency
Mobile (320px): Look for stacking issues in smaller screens.
Tablet (768px): Ensure smooth menu transitions.
Desktop (992px+): Double-check grid alignment.
Animation Performance
Aim for a framerate of 60fps for fluid transitions.
Use Framer Motion’s debug mode to pinpoint areas causing slowdowns.
Simplify animations that dip below 30fps.
Monthly Maintenance Checklist
Keep your projects running smoothly with a monthly testing routine:
Run Lighthouse audits to spot performance bottlenecks.
Monitor Core Web Vitals using built-in reporting tools.
Test responsive layouts on various devices.
Validate form submissions and interactive elements.
Why is this important? A whopping 82% of consumers say slow page speeds impact their buying decisions. By adopting these practices early, you’ll build the skills needed to create websites and apps that perform seamlessly.
For more advanced tips on debugging and optimization, check out the Webflow and Framer templates available at Offlens Studio. They’re a great resource to take your skills to the next level.
Conclusion
Becoming proficient in Webflow or Framer doesn’t happen overnight, but with consistent practice and the right approach, you can speed up your progress. The tips shared earlier, combined with hands-on experience, will help you move from beginner to expert more effectively.
Your journey can be broken down into clear stages, each building on the last. Here’s how your growth might look:
Learning Phase | Focus Area | Expected Outcome |
|---|---|---|
Foundation | Basic tools and layouts | Confidently navigating the platform |
Development | Official training and simple projects | Building functional components |
Advanced | Community engagement and complex features | Designing professional-level projects |
Mastery | Troubleshooting and optimization | Delivering polished, high-performing results |
The key to real progress is getting your hands dirty - experimenting, testing, and iterating. Along the way, professional resources can help bridge the gap between learning and execution. For example, Offlens Studio offers templates and guidance tailored for tools like Figma, Framer, and Webflow. These resources can help you turn your knowledge into professional-quality projects.
FAQs
What are the key differences between Webflow and Framer, and when should you use each?
Webflow and Framer are both excellent tools, but they cater to different needs depending on the type of project you're working on.
Webflow is perfect for building fully functional, responsive websites with plenty of customization options. It’s a go-to for designers who want to bring their ideas to life as production-ready websites - no extensive coding required. Plus, it offers seamless hosting integration, making it a solid choice for end-to-end website creation.
Framer, meanwhile, excels at creating interactive and visually rich prototypes or landing pages. It’s ideal for projects that need animations, micro-interactions, or user experience testing before diving into full-scale development.
So, how do you decide? If you’re aiming for a complete, polished website, Webflow is your tool. But if you’re focused on crafting dynamic prototypes or smaller, design-heavy projects, Framer is the better fit.
How can I use online communities to improve my skills in Webflow or Framer?
Online communities are an excellent way to dive deeper into Webflow or Framer. By joining spaces like forums, social media groups, or design-centric platforms, you can connect with seasoned users and fellow learners to swap tips, solve problems, and find creative inspiration.
Get involved by joining discussions, asking questions, or showcasing your projects to gather feedback. Many of these communities also offer tutorials, webinars, and challenges that can help you build your skills while keeping you motivated. Being part of these groups not only speeds up your learning process but also keeps you informed about the newest features and techniques for Webflow and Framer.
How can I troubleshoot performance issues in my Webflow or Framer projects?
To address performance issues in your Webflow or Framer projects, start by pinpointing elements that could be slowing things down. Start with images - compress them to minimize load times and ensure you're using the right file formats, like JPEG or PNG for static images and SVG for scalable graphics.
For animations, keep things simple. Limit the number of interactions happening at the same time and avoid overly intricate sequences that could bog down performance.
Next, take a closer look at your project settings. In Webflow, remove unused styles and unnecessary elements to avoid bloating your design. In Framer, focus on keeping components well-organized and avoid too much nesting, which can make your project harder to process.
Make it a habit to preview your project frequently. This lets you test its performance and tweak any problem areas before they become bigger issues. Clean, streamlined designs not only run better but also create a smoother experience for your users.
Related posts
The Ultimate Guide to Product Design for Startups
How to Use Webflow for Faster Design Processes
Webflow vs Framer: Ease of Use for Startups
Design
May 8, 2025
Master the Basics: Get familiar with tools like the Navigator Panel, Design Tools, and Canvas Area.
Use Official Resources: Start with Webflow University and Framer Learn for step-by-step tutorials.
Build Small Projects: Practice by creating simple websites like landing pages or contact forms.
Join Online Communities: Connect with Webflow and Framer forums to get advice, feedback, and inspiration.
Increase Complexity Gradually: Start with static layouts and slowly add animations, interactions, and responsive designs.
Learn Design Methods: Focus on responsive design, accessibility, and performance optimization.
Practice Troubleshooting: Use built-in testing tools to find and fix issues like layout bugs or slow load times.
Quick Comparison: Webflow vs. Framer
Feature | Webflow | Framer |
|---|---|---|
Learning Resources | Webflow University (100+ hours) | Framer Learn (interactive guides) |
Design Focus | Visual coding + responsive design | Prototyping + animations |
Best For | Polished websites | Interactive experiences |
Community | ||
Performance Tools | Audit panel | Debug mode for animations |
Pro Tip: Start small, practice consistently, and use community feedback to improve. Whether you’re a beginner or leveling up, these platforms can help you create professional-quality websites and apps.
Learn Framer For Beginners: Mini Course (2024)
1. Learn the Basic Tools and Layout
Getting comfortable with the basic tools and layout is the first step to creating an efficient design workflow. By understanding how the key features work together, you'll set yourself up for success in your design projects.
Key Areas to Know
Navigator Panel: Found on the left side, this is your go-to for organizing your workspace. It keeps all your elements neatly arranged for quick access.
Design Tools: Located on the right sidebar, these controls let you handle style settings, animations, breakpoints for responsive design, and even preview your work.
Canvas Area: This is the heart of your workspace. Here, you can:
Zoom, pan, and align elements with precision
Switch between desktop and mobile views
Preview interactions as you build them
Tips to Build Confidence with the Tools
Learn and use keyboard shortcuts - they’ll save you tons of time.
Keep your layers and components organized from the start to avoid confusion later.
Save your work often and use version control to track changes.
Spend time experimenting on a blank canvas. It’s a great way to build muscle memory and get a deeper understanding of the tools.
2. Use Official Training Materials
If you're serious about mastering Webflow or Framer, their official training materials should be your go-to resource.
Official Learning Paths
Both platforms provide structured courses to help you level up:
Webflow University: This free platform offers over 100 hours of video tutorials. You'll find everything from basic navigation to advanced animations and interactions.
Framer Learn: An interactive hub packed with tutorials, video guides, and hands-on exercises.
Once you’ve absorbed the lessons, put your knowledge to work through practice.
Getting the Most Out of Official Resources
Start with the foundational courses. These will guide you through essential skills like navigating the interface, creating components, responsive design, and animation basics. Stick to the recommended sequence to ensure you don’t miss any critical steps.
Add-On Learning Tools
While official resources are your main focus, you can deepen your understanding with these extras:
Documentation: The official docs are perfect for quick lookups and clarifications.
Templates: Study official templates to see how experts structure projects.
Community Projects: Browse showcase galleries to get inspired by real-world examples.
These supplementary tools help connect the dots between theory and hands-on application.
Practice Makes Perfect
Don’t just watch or read - practice! Complete every exercise to solidify your skills.
Pro Tip: Set up a dedicated practice project where you can freely experiment with the techniques you’re learning. It’s a safe space to try things out without the fear of messing up a live project.
3. Build Simple Test Projects
Once you've got the basics down, it's time to put your skills to work with small, manageable projects. These exercises will not only boost your confidence but also help you get a deeper understanding of key features in tools like Webflow or Framer.
Start with Straightforward Projects
Kick things off with simple ideas like a personal landing page, a product showcase, or a basic contact form. These types of projects are great for mastering core functionalities without feeling overwhelmed.
Set Realistic Deadlines
Sometimes, all it takes is focused effort to create something impressive in a short time. Offlens Studio has demonstrated this by completing a landing page project in less than 24 hours.
Louis (@louiss) shared his experience:
"I worked with them to launch my landing page. They said they could do the job in under 24 hours and that is exactly what they did. Super happy about the result, it's exactly what I wanted and described to them. 10/10 Would absolutely recommend them to build and launch landing pages."
Simplify Complex Features
When tackling more advanced features, break them into smaller, manageable steps:
Start with Structure: Build the basic layout to establish the framework.
Add Styling: Focus on typography, colors, and overall design aesthetics.
Implement Interactions: Introduce simple animations or hover effects.
Test Responsiveness: Make sure everything looks and works well on mobile devices.
Prioritize Quality Over Speed
While quick turnarounds can be impressive, taking the time to fully understand each feature will lead to better results in the long run.
Perrin (@perrrrrrin) praised a similar approach:
"They were absolutely amazing for the Figma and Framer work. They understood the task in one sentence, and got the job done in 12 hours!! I was expecting a few days but they really went above and beyond with speed and quality. Highly recommend them."
Stay Organized
Good organization is key to a smooth workflow. Use clear folder structures and consistently name your components. As you go, document what you learn and thoroughly test your work before moving on to the next step.
Once you’ve nailed a few basic projects, you can start pushing yourself with more complex challenges. Each step will bring you closer to mastering these tools.
4. Join Online Design Groups
Once you've got a handle on the tools and have started building projects, connecting with other designers can take your skills to the next level. Joining online design communities is a great way to sharpen your Webflow or Framer expertise while learning from others.
Where to Find Support
Online communities like the Webflow Forum and Framer Community are treasure troves of advice and inspiration. Here's what you can gain by being part of these groups:
Get help with technical questions
Share your work and receive constructive feedback
Learn best practices from experienced designers
Explore new techniques and platform features
Build connections with like-minded creatives
These spaces are perfect for solving problems quickly and learning actively through collaboration.
Making the Most of Community Resources
Dive in by introducing yourself and sharing your learning goals. This not only helps others understand how they can assist you but also lays the foundation for meaningful interactions. Posting your progress - complete with before-and-after examples or challenges you've tackled - can solidify your learning and inspire others.
Stay in the Loop with Platform Updates
One of the biggest perks of being part of these groups? Staying informed about platform updates and trends. Community discussions often highlight:
New feature rollouts and how to use them
Workflow changes caused by updates
Practical solutions for common issues
Insights into emerging design trends
By keeping up with these conversations, you can adapt quickly and stay ahead of the curve.
How to Engage Effectively
To get the most out of these communities, focus on meaningful participation. Here are some tips:
Clearly explain your goals or the challenges you're facing
Include screenshots or links to provide context
Follow up on threads with updates or solutions you’ve discovered
Share your knowledge as you grow to help others
Even after you've mastered the basics, these communities can remain an invaluable resource. Regularly engaging with them ensures your skills stay sharp and keeps you connected to the latest in design and platform advancements.
5. Increase Project Difficulty Slowly
The best way to grow your skills is by taking it step by step. Start with the basics and work your way up to more challenging tasks. This approach helps you build confidence while avoiding burnout.
Start with Simple Layouts
Begin by designing clean, static layouts. Focus on organizing elements, perfecting spacing, and ensuring responsiveness. This will give you a solid grasp of layout structure and typography, which are essential building blocks for any project.
Add Complexity Gradually
Once you’re comfortable with basic layouts, challenge yourself by recreating existing websites or templates. Slowly introduce interactive features like hover effects and smooth transitions. This steady progression allows you to expand your abilities without feeling overwhelmed.
Practice to Build Confidence
Every project you complete strengthens your foundation and boosts your confidence. By starting small and gradually increasing the complexity, you’ll develop the practical skills needed to tackle advanced projects with ease.
6. Study Common Design Methods
Getting a handle on design fundamentals in tools like Webflow and Framer can make your learning curve much smoother. Start by focusing on these three key areas:
Responsive Design Fundamentals
Responsive design is all about creating layouts that adapt seamlessly across devices. Here's how you can structure your layouts effectively:
Desktop (992px and up): Stick to a 12-column grid system for clean, organized layouts.
Tablet (768–991px): Simplify the design with a 2-column layout for better usability.
Mobile (below 768px): Shift to a single-column stack to ensure everything fits neatly on smaller screens.
Both Webflow and Framer offer tools to handle these transitions, with Webflow using predefined breakpoints and Framer allowing custom ones. These practices also align with accessibility and performance goals.
Accessibility Best Practices
Good design is inclusive. Focus on these accessibility elements to ensure your designs work for everyone:
Accessibility Feature | How to Implement |
|---|---|
Color Contrast | Maintain a minimum 4.5:1 contrast ratio for text and backgrounds. |
Text Readability | Use a 16px base font and scale down slightly (to 14px) for mobile devices. |
Navigation | Make sure keyboard focus states are clear and functional. |
Accessibility isn’t just ethical - it also improves user experience for everyone. And when paired with performance optimization, it creates a seamless experience.
Performance Optimization
Fast-loading pages are non-negotiable. Here's how you can optimize performance:
Image Optimization
Compress images and size them appropriately. This simple step can reduce page weight by as much as 1MB.
Layout Efficiency
Speed matters. Research shows pages that load in 2 seconds experience a 9% bounce rate, compared to 38% for pages taking 5 seconds. In fact, half of users value speed over flashy animations.Mobile-First Approach
Start designing for the smallest screen first (320px Mobile Portrait breakpoint) and scale up. Mobile devices often take up to 70.9% longer to load pages compared to desktops, so efficient design is critical.
7. Practice Finding and Fixing Issues
Now that you've honed your design and performance optimization skills, it's time to focus on troubleshooting. Tackling problems effectively in Webflow and Framer means practicing with real-world scenarios. Here’s how you can sharpen your ability to spot and resolve design hiccups.
Built-in Testing Tools
Both Webflow and Framer come equipped with tools to help you debug like a pro. Webflow’s Audit panel automatically checks accessibility and ensures contrast ratios meet standards. On the other hand, Framer Motion has a debug mode that lets you visualize animation paths. To activate it, simply use this code snippet:
These tools are your first line of defense when it comes to performance testing.
Performance Optimization Workflow
Did you know that even a slight delay in load times can hurt conversion rates? Monitoring the right metrics can make all the difference. Here are the key areas to focus on:
Testing Phase | Key Metrics | Target Values |
|---|---|---|
Initial Load | First Contentful Paint | < 1.5 seconds |
Interaction | Time to Interactive | < 3.0 seconds |
Layout Stability | Cumulative Layout Shift | < 0.1 |
Make these metrics a regular part of your testing process to ensure your site performs at its best.
Real-World Success Stories
Case studies show that faster load times can drastically reduce bounce rates, proving how crucial performance optimization is for user retention.
Common Issues and Solutions
Here are some frequent problems and how to address them:
Image Optimization
Use native compression to significantly reduce file sizes.
Implement lazy loading for images that don’t need to load immediately.
Layout Consistency
Mobile (320px): Look for stacking issues in smaller screens.
Tablet (768px): Ensure smooth menu transitions.
Desktop (992px+): Double-check grid alignment.
Animation Performance
Aim for a framerate of 60fps for fluid transitions.
Use Framer Motion’s debug mode to pinpoint areas causing slowdowns.
Simplify animations that dip below 30fps.
Monthly Maintenance Checklist
Keep your projects running smoothly with a monthly testing routine:
Run Lighthouse audits to spot performance bottlenecks.
Monitor Core Web Vitals using built-in reporting tools.
Test responsive layouts on various devices.
Validate form submissions and interactive elements.
Why is this important? A whopping 82% of consumers say slow page speeds impact their buying decisions. By adopting these practices early, you’ll build the skills needed to create websites and apps that perform seamlessly.
For more advanced tips on debugging and optimization, check out the Webflow and Framer templates available at Offlens Studio. They’re a great resource to take your skills to the next level.
Conclusion
Becoming proficient in Webflow or Framer doesn’t happen overnight, but with consistent practice and the right approach, you can speed up your progress. The tips shared earlier, combined with hands-on experience, will help you move from beginner to expert more effectively.
Your journey can be broken down into clear stages, each building on the last. Here’s how your growth might look:
Learning Phase | Focus Area | Expected Outcome |
|---|---|---|
Foundation | Basic tools and layouts | Confidently navigating the platform |
Development | Official training and simple projects | Building functional components |
Advanced | Community engagement and complex features | Designing professional-level projects |
Mastery | Troubleshooting and optimization | Delivering polished, high-performing results |
The key to real progress is getting your hands dirty - experimenting, testing, and iterating. Along the way, professional resources can help bridge the gap between learning and execution. For example, Offlens Studio offers templates and guidance tailored for tools like Figma, Framer, and Webflow. These resources can help you turn your knowledge into professional-quality projects.
FAQs
What are the key differences between Webflow and Framer, and when should you use each?
Webflow and Framer are both excellent tools, but they cater to different needs depending on the type of project you're working on.
Webflow is perfect for building fully functional, responsive websites with plenty of customization options. It’s a go-to for designers who want to bring their ideas to life as production-ready websites - no extensive coding required. Plus, it offers seamless hosting integration, making it a solid choice for end-to-end website creation.
Framer, meanwhile, excels at creating interactive and visually rich prototypes or landing pages. It’s ideal for projects that need animations, micro-interactions, or user experience testing before diving into full-scale development.
So, how do you decide? If you’re aiming for a complete, polished website, Webflow is your tool. But if you’re focused on crafting dynamic prototypes or smaller, design-heavy projects, Framer is the better fit.
How can I use online communities to improve my skills in Webflow or Framer?
Online communities are an excellent way to dive deeper into Webflow or Framer. By joining spaces like forums, social media groups, or design-centric platforms, you can connect with seasoned users and fellow learners to swap tips, solve problems, and find creative inspiration.
Get involved by joining discussions, asking questions, or showcasing your projects to gather feedback. Many of these communities also offer tutorials, webinars, and challenges that can help you build your skills while keeping you motivated. Being part of these groups not only speeds up your learning process but also keeps you informed about the newest features and techniques for Webflow and Framer.
How can I troubleshoot performance issues in my Webflow or Framer projects?
To address performance issues in your Webflow or Framer projects, start by pinpointing elements that could be slowing things down. Start with images - compress them to minimize load times and ensure you're using the right file formats, like JPEG or PNG for static images and SVG for scalable graphics.
For animations, keep things simple. Limit the number of interactions happening at the same time and avoid overly intricate sequences that could bog down performance.
Next, take a closer look at your project settings. In Webflow, remove unused styles and unnecessary elements to avoid bloating your design. In Framer, focus on keeping components well-organized and avoid too much nesting, which can make your project harder to process.
Make it a habit to preview your project frequently. This lets you test its performance and tweak any problem areas before they become bigger issues. Clean, streamlined designs not only run better but also create a smoother experience for your users.
Related posts
The Ultimate Guide to Product Design for Startups
How to Use Webflow for Faster Design Processes
Webflow vs Framer: Ease of Use for Startups